
Battling: Difference between revisions
From Grouse House Wiki
(Created page with "{{ComingSoon}} Battling is a primary mechanic on Wolvden which you'll encounter frequently while exploring! Battling is often required for progressing in events, unlocking content, and collecting useful items, so it's an important feature to understand. The mechanic is complex, so we'll go over the way it works and some tips for succeeding on this page! If you're looking for details about every battle enemy, we recommend checking out the Battle Enemies page....") |
|||
| (25 intermediate revisions by the same user not shown) | |||
| Line 1: | Line 1: | ||
Battling is a primary mechanic on Wolvden which you'll encounter frequently while [[exploring]]! Battling is often required for progressing in events, unlocking content, and collecting useful items, so it's an important feature to understand. The mechanic is complex, so we'll go over the way it works and some tips for succeeding on this page! | |||
If you're looking for details about every battle enemy, we recommend checking out the [[Battle Enemies]] page. This page will just cover the mechanics of battling itself. | |||
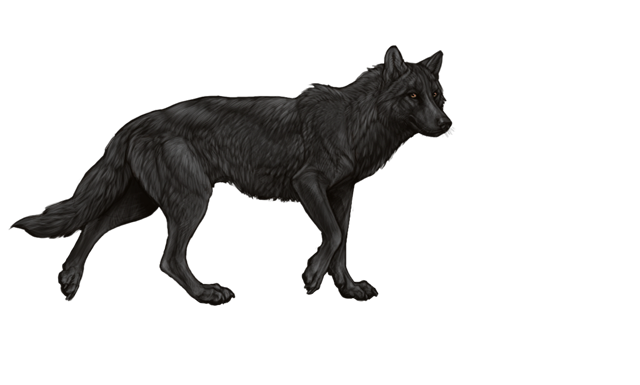
<center><html><img src="https://grousehouse.wiki/images/1/11/taladay.png" style="width: 400px;"></html></center> | |||
| Line 13: | Line 13: | ||
| class="disclaimer | ''Links not working? Sections must be expanded to jump to a subheader within them!'' | | class="disclaimer | ''Links not working? Sections must be expanded to jump to a subheader within them!'' | ||
|- | |- | ||
| class="mtocl1" | [[Battling# | | class="mtocl1" | [[Battling#Battling|Battling]] | ||
|- | |||
| class="mtocl2" | [[Battling#Battle Enemies|Battle Enemies]] | |||
|- | |- | ||
| class="mtocl2" | [[Battling#Interface|Interface]] | | class="mtocl2" | [[Battling#Interface|Interface]] | ||
|- | |- | ||
| class="mtocl2" | [[Battling# | | class="mtocl2" | [[Battling#Battling Process|Battling Process]] | ||
|- | |- | ||
| class="mtocl2" | [[Battling#Battling Moves|Battling Moves]] | |||
|- | |||
| class="mtocl2" | [[Battling#Battle Statuses|Battle Statuses]] | |||
|- | |||
| class="mtocl2" | [[Battling#Lucky Foots|Lucky Foots]] | |||
|- | |||
| class="mtocl1" | [[Battling#Battling Strategies|Battling Strategies]] | |||
|- | |||
| class="mtocl1" | [[Battling#Battle Talents|Battle Talents]] | |||
|- | |||
| class="mtocl2" | [[Battling#Achievements|Achievements]] | |||
|- | |||
| class="mtocl1" | [https://grousehouse.wiki/Battle_Enemies Battle Enemy Masterlists] | |||
|} | |} | ||
{{SectionToggles}} | {{SectionToggles}} | ||
<h2 class="c-header active">Battling | <h2 class="c-header active">Battling</h2> | ||
<div class="c-content" style="display: block;"> | <div class="c-content" style="display: block;"> | ||
== Battling | == Battling == | ||
While | While [[exploring]], you'll frequently come across battle enemies you can fight for a chance to win rewards! The battle enemies you can find are different in every biome, with some overlap, and some enemies are exclusive to events. You can find lists of all battle enemies from the [[Battle Enemies]] page. | ||
| Line 36: | Line 51: | ||
Battling uses '''energy''' and '''health points (HP)''' from your lead wolf, both which you can view in the sidebar panel underneath your lead wolf's profile picture on any page. While you can still battle without any energy, your moves will have a lower chance of landing. | Battling uses '''energy''' and '''health points (HP)''' from your lead wolf, both which you can view in the sidebar panel underneath your lead wolf's profile picture on any page. While you can still battle without any energy, your moves will have a lower chance of landing. Any battle started while you're at 0 HP will automatically end immediately, so make sure that you're healing up regularly! Clicking on the medicine pouch highlighted below will allow you to quickly access your healing salves while you're exploring, so you can heal up before any battle. | ||
| Line 42: | Line 57: | ||
Your lead wolf's '''stats play a large role in battle success'''. Lower-stat leads typically have a more difficult time defeating enemies, especially high-level enemies. Having as high a stat value in every stat, except for Wisdom, will contribute greatly to your battle wins! Wisdom is not used for any battle moves or rolls, so don't worry about keeping this stat up the same as the other ones! | Your lead wolf's '''stats play a large role in battle success'''. Lower-stat leads typically have a more difficult time defeating enemies, especially high-level enemies. Having as high a stat value in every stat as you can, except for Wisdom, will contribute greatly to your battle wins! Wisdom is not used for any battle moves or rolls, so don't worry about keeping this stat up the same as the other ones. | ||
<h3 class="c-header active">Battle Enemies</h3> | |||
<div class="c-content" style="display: block;"> | |||
=== Battle Enemies === | |||
There are a large variety of battle enemies available to fight, with some being limited to events and biomes. Each enemy has its own specifics that make battling them unique. You can find full lists of all battle enemies from the [[Battle Enemies]] page. | |||
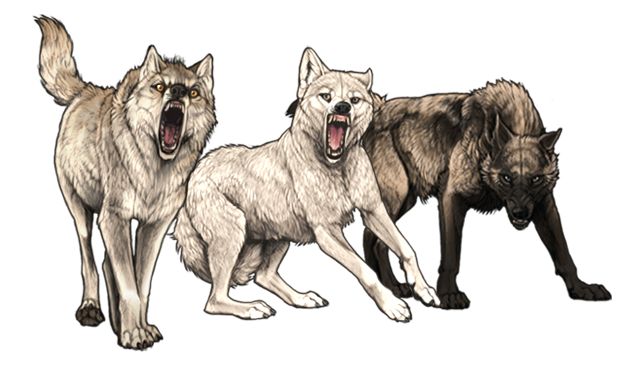
<center><html><img src="https://grousehouse.wiki/images/e/e8/Alaskantundrawolfpackday.png" style="width: 400px;"></html></center> | |||
Each enemy has a few attributes that you can consider before starting the battle: '''level''', '''stats''', '''modifiers''', and '''trophy drops'''. | |||
You can view the '''level''' of most enemies before entering the battle with them. This can help give you an idea of how difficult the battle will be! An enemy with a level much higher than yours will typically be more difficult for you to defeat. Enemies can be level 1 to level 25, with the levels above 20 being reserved for boss enemies and one specific explore encounter (keep moving forward against the small critters to encounter a wolf always 5 levels above your level). | |||
<center>[[File:enemylevel.png|300px]]</center> | |||
Each enemy has a set of associated '''stats''' that it uses in battle and that it can drop upon defeat. These stats are different for each enemy, but there are some general trends. For example, all bear enemies use and drop Strength, while fox enemies use and drop Agility and Smarts. '''All enemies can drop the Wisdom stat, but no enemies use the Wisdom stat in battle'''. If you're looking for specific stats to gain on your lead wolf, you can target enemies that you know will only drop specific stats. Otherwise, you can target enemies that you know use a stat that your lead wolf is very proficient in to aid your chance of beating them. The [[Battle Enemies]] pages list the stats that we know about for every battle enemy. | |||
Many battle enemies, but not all, have a set of '''modifiers''' that influence how different battle moves affect them. These modifiers are based on the type of animal you are fighting, and could benefit either you or the enemy. You'll always be able to view the effects of modifiers in battle by hovering over or tapping on the dice rolls in the battle log next to each move that you make. A list of all enemy modifiers is available below, and the modifiers we're aware of for every battle enemy are available on the [[Battle Enemies]] pages. | |||
<table class="tableA" style="width: 50%; margin: auto;"> | |||
<tr><th>Modifier</th><th>Effects</th></tr> | |||
<tr><th>Fearless</th><td style="text-align: left;">-1 on Rest/Wait | |||
-1 on Chase | |||
-1 on Snarl</td></tr> | |||
<tr><th>Group</th><td style="text-align: left;"> +1 on Focus | |||
-1 on Latch | |||
-1 on Snarl | |||
-1 on Snap | |||
-1 on Tumble</td></tr> | |||
<tr><th>Large Prey</th><td style="text-align: left;">+1 on Snarl</td></tr> | |||
<tr><th>Prey</th><td style="text-align: left;">+1 on Rest/Wait | |||
+2 on Chase | |||
+2 on Retreat</td></tr> | |||
<tr><th>Small Prey</th><td style="text-align: left;">+1 on Snarl</td></tr> | |||
<tr><th>Slow</th><td style="text-align: left;">+1 on Rest/Wait | |||
+1 on Retreat | |||
+1 on Tumble | |||
-2 on Chase</td></tr> | |||
<tr><th>Soft Skin</th><td style="text-align: left;">+1 on Shear</td></tr> | |||
<tr><th>Strong Venom</th><td style="text-align: left;">Enemy gets +1 on its bite attacks</td></tr> | |||
<tr><th>Thick Skin</th><td style="text-align: left;">-1 on Shear</td></tr> | |||
</table> | |||
Each enemy also has a set collection of '''potential trophy drops''' that can be dropped rarely upon defeat. In order to start collecting trophies from enemies, your lead wolf must be at least '''level 10'''. After that, you can collect items from defeating enemies '''Level 5 and higher''' while exploring, many of which can be used for crafting! Many crafting recipes are available as trophy drops, as well. The [[Battle Enemies]] pages contain all of the trophy items that we are aware of for each enemy. | |||
<center>[[File:hoof_large.png]][[File:skull_bear.png]][[File:fangs_canine.png]]</center> | |||
</div> | |||
<h3 class="c-header active">Interface</h3> | <h3 class="c-header active">Interface</h3> | ||
<div class="c-content" style="display: block;"> | <div class="c-content" style="display: block;"> | ||
=== Interface === | === Interface === | ||
| Line 61: | Line 143: | ||
In the center of the screen, you'll find your available battle moves. The moves that are available to you depend on a few factors. If you | In the center of the screen, you'll find your available battle moves. The moves that are available to you depend on a few factors. If you win the initiative roll at the beginning of the battle, you'll have access to the some opening moves which you can use only on the first turn of the battle. We explain opening moves in detail in the [[Battling#Battling_Process|Battling Process]] part of this page. For most of the battle, you'll have access to generic moves: Bite, Latch, Rest, and Flee. Using Latch has a chance to grab onto the enemy, allowing you access to three more moves: Shear, Crush, and Release. If the enemy has grabbed onto you, you'll be limited in the amount of moves you can use while you're trying to escape. Finally, if you have one of the lead wolf [[Talents]] granting a special move, a special move might be available to you as an opening move or limited once-per-battle move. '''Since each battle move has its own specifics, we'll cover these in the [[Battling#Battle_Moves|Battle Moves]] section of this page. | ||
Underneath your available move set, you'll find a step by step log of every move that's been taken in battle. This is a very useful resource if you want to get into the intricacies of battle mechanics. These logs can help you understand battle enemy specifics and refine the moves you're using to better fit the enemy that you're fighting. Green text indicates that it's a move that you've made, while red text indicates that it's a move your enemy has made. There are a few parts to this menu. | Underneath your available move set, you'll find a step-by-step log of every move that's been taken in battle. This is a very useful resource if you want to get into the intricacies of battle mechanics. These logs can help you understand battle enemy specifics and refine the moves you're using to better fit the enemy that you're fighting. Green text indicates that it's a move that you've made, while red text indicates that it's a move your enemy has made. There are a few parts to this menu. | ||
| Line 70: | Line 152: | ||
On the left side of the log, you'll find a dice icon. As we explain in the [[Battling#Battling_Process|Battling Process]] section of this page, the success of every move is based on a dice roll. You can view the dice rolled for each move by hovering over or tapping on the icon on the left side of the associated log. Hovering over this dice will reveal any modifiers that were applied to the dice roll because of stats, enemy characteristics, | On the left side of the log, you'll find a dice icon. As we explain in the [[Battling#Battling_Process|Battling Process]] section of this page, the success of every move is based on a dice roll. You can view the dice rolled for each move by hovering over or tapping on the icon on the left side of the associated log. Hovering over this dice will reveal any modifiers that were applied to the dice roll because of stats, enemy characteristics, [[Battling#Battle_Statuses|statuses]], or talents. For example, in the screenshot above, the dice roll applied to this move determined the chance for the move to inflict the effect Bleeding on this enemy. The bite move received a -1 base modifier as all bite attacks do, as well as a -1 Biter modifier from the Biter talent, which increases damage caused by the move but decreases the chance for the bite to inflict Bleeding. Since it didn't roll higher than 3, the cutoff for a successful move, the bite did not inflict Bleeding. | ||
On the right side of the log, you may occasionally see a | On the right side of the log, you may occasionally see a status indicator. In the screenshot above, the double down arrows indicate that the enemy is losing the status Locked by breaking free from the hold. Double up arrows would indicate that the enemy has gained that status. As another example, the enemy below has gained the status Bleeding after a successful Shear dice roll. We detail all battle statuses in the [[Battling#Battle_Statuses|Battle Statuses]] section of this page. | ||
| Line 86: | Line 168: | ||
<h3 class="c-header active">Battling Process</h3> | <h3 class="c-header active">Battling Process</h3> | ||
<div class="c-content" style="display: block;"> | <div class="c-content" style="display: block;"> | ||
=== Battling Process === | === Battling Process === | ||
Battling is a '''turn-based mechanic''', meaning that you and the enemy take turns making moves. The process of any battle can be broken down into a few steps: the '''initiative roll/opening move''', the '''main battle''', and the '''results'''. We'll go through each of these steps in detail here. | |||
'''Initiative Rolls and Opening Moves''' | |||
When you enter a battle with any enemy, an '''initiative''' is immediately rolled determining which of you gets to attack first. This dice roll is influenced by a specific stat which is randomized between all of an enemy's possible associated stats. An enemy's initiative roll stats are the same stats that it can drop after being defeated, with the exception of Wisdom, since Wisdom is never used in battle (but can be dropped by defeating any enemy). For example, the Bobcat's associated stats are Agility and Smarts, so its initiative roll will be influenced by either Agility or Smarts. The initiative roll is not influenced by applying a Lucky Foot before the battle. You can view all enemy stats on the battle enemy pages available from the main [[Battle Enemies]] page. | |||
<center>[[File:battlefirstmoveloss.png|500px]]</center> | |||
If you enter the battle with a lower value of the initiative stat than the enemy you're facing, your initiative dice roll will receive a -1 modifier like in the example above, making it less likely that you will receive the first move. It's difficult to know before the battle if the enemy has higher stats than you, since it's not labeled anywhere. Generally, an enemy with a higher level than you will have higher stats than you, and more challenging enemies like bears and bosses will also have generally higher stats. The lead wolf [[Talents|talent]] Ambush adds +1 to any initiative dice roll, making your chance to win the initiative slightly higher. | |||
If the intiative dice roll is successful (>3), you will be permitted to act first and use an '''opening move'''. If it's unsuccessful (<4), the enemy will make the first move. | |||
Opening moves are the same in every battle. By default, if you win the opening move, you will be able to choose between Snarl, Focus, Lunge, and Chase. The efficiency of these moves will depend partly on the enemy's modifiers, explained in the [[Battling#Battle Enemies|Battle Enemies]] section of this page. They will also be affected by your lead wolf's stats! There are also some opening moves that can be added using lead wolf [[Talents]]. Evade and Rush are talent opening moves that affect the amount of damage done for the rest of the battle. Since every battle move has its own specifics, we'll cover these in the [[Battling#Battle_Moves|Battle Moves]] section of this page. Choosing the right opening move can contribute to your victory in the battle! | |||
'''The Main Battle''' | |||
Throughout the remainder of the battle, you and the enemy will take turns making moves until one of you runs out of HP or you flee the battle. You can keep track of what's happening in the battle log at the bottom of the battling screen. | |||
The success of each move is dependent on a dice roll. You can view your dice rolls in the battle log, while the enemy’s rolls are hidden. Rolling higher than 3 results in a successful move and rolling lower than 4 results in a failed move. There are moves that are more effective against certain enemies and with certain battle statuses, which you can use to give yourself an advantage during this main battle stage. Since every move has its own specifics, we'll cover all of them in the [[Battling#Battle_Moves|Battle Moves]] section of this page. | |||
If you'd like to leave the battle at any time, such as when you've realized that you cannot win, you can choose to Flee as long as the enemy doesn't have you Locked. There's a small chance that the enemy will be able to land a final attack on your as you're fleeing, costing you more damage!Battles which you have fled from will not be counted in your lead wolf's total battle or lost battle stats, it will be as though the battle never happened. | |||
<center>[[File:battlemovebar.png|500px]]</center> | |||
Throughout the battle, you will also have the option to apply a Lucky Foot to the battle if you have one available in your Hoard and you do not already have one applied. Lucky Foots automatically add a +1 modifier to every move that you make in the battle. | |||
'''Battle Results''' | |||
Congratulations on a completed battle! At this point, you've either won or lost against the battle enemy. Either way, there's things to be gained. | |||
Winning a battle will always reward you with '''experience points''' for your lead wolf. If your lead wolf is already the max level 20, this experience will not be counted. There's chance that any victorious battle will reward [[File:icon-sc.png]] '''Silver Cones''', '''Meat Chunks''', or '''Medicine: Healing Salves''', as well! | |||
If your lead wolf is level 10 or higher and the enemy is level 5 or higher, '''trophies''' are a potential additional drop from enemies, rewarding you with a rare enemy-specific item like a skull, pelt, or recipe. | |||
Enemies may also drop a stat point, with the stat dropped corresponding to the enemy battled. For lead wolves level 1-17, stat points can drop from enemies higher level than the lead or within three levels lower. For lead wolves level 18-20, stats can drop from enemies level 15 and higher. | |||
<center>[[File:Meatchunklarge.png]][[File:Healingsalve.png]]</center> | |||
Losing a battle typically doesn't grant you any reward, but there are some rare cases in which it could! Rarely, your lead wolf might gain an affliction such as Open Wound or Poison after losing a battle. When losing a battle against any Lunar enemy, there's a small chance that you'll be granted a '''special Lunar recipe'''! The [[Lunar Battle Enemies]] page lists the potential drops from losing to a Lunar enemy. | |||
<center>[[File:scroll_lunar.png]]</center> | |||
| Line 93: | Line 236: | ||
<h3 class="c-header active">Battling Moves</h3> | <h3 class="c-header active">Battling Moves</h3> | ||
<div class="c-content" style="display: block;"> | <div class="c-content" style="display: block;"> | ||
=== Battling Moves === | === Battling Moves === | ||
There are many moves that are available for you to use during battle, each with their own stat influences, effects, and modifier changes. We've included each in the table below with a quick explanation of each column here. Further down in the section, you'll find an additional table detailing environments that each move is best used in. | |||
'''Availability''': Indicates when the move is available for you to use | |||
'''Stat''': The stat associated with the move, if any. When a move has an associated stat, you will receive modifiers on your dice roll for that move based on your enemy's stats. If the enemy has a higher stat than you, you will receive a negative modifier on this move, while you will receive a positive modifier if you have a higher stat than the enemy | |||
'''Successful Roll''': The effect that a successful roll of this move has, with descriptions of the effect in parenthesis | |||
'''Fail Roll''': The effect that an unsuccessful roll of this move has, with descriptions of the effect in paranthesis | |||
<table class="tableA" style="width: 100%; font-size: 12px;"> | |||
<tr><th style="width: 10%;">Move</th><th style="width: 20%;">Availability</th style="width: style="width: 30%;"><th>Successful Roll</th><th style="width:30%;">Fail Roll</th><th style="width: 10%;">Stat</th></tr> | |||
<tr><th>Bite</th> | |||
<td>Basic Move</td><td>Deals damage<br>Inflict Bleeding (drains enemy HP)<br>Inflict Badly Bleeding (if Bleeding already applied, drains enemy HP quicker)</td><td>Deals damage</td><td>N/A</td></tr> | |||
<tr><th>Chase</th> | |||
<td>Opening Move</td><td>Inflicts Tired (+2 Rest/Wait)</td><td>No effect</td><td>Speed</td></tr> | |||
<tr><th>Crush</th> | |||
<td>Lock Move (use Latch to Lock enemy)</td><td>Deals damage<br>Inflict Bleeding (drains enemy HP)<br>Inflict Badly Bleeding (if Bleeding already applied, drains enemy HP quicker)</td><td>Deals damage</td><td>Strength</td></tr> | |||
<tr><th>Escape</th> | |||
<td>Locked Move (enemy inflicted Locked)</td><td>Recovers Locked status</td><td>No effect</td><td>Strength</td></tr> | |||
<tr><th>Evade</th> | |||
<td>Talent Opening Move</td><td>Inflicts Evade (-1 damage on all of the enemy's move)</td><td>Cannot fail</td><td>N/A</td></tr> | |||
<tr><th>Flee</th> | |||
<td>Basic Move</td><td>Ends the battle</td><td>Ends the battle, but lose some HP</td><td>Speed</td></tr> | |||
<tr><th>Focus</th> | |||
<td>Opening Move</td><td>Inflicts Focus (Increased damage, +1 Rest/Wait)</td><td>No effect</td><td>Smarts</td></tr> | |||
<tr><th>Latch</th> | |||
<td>Basic Move</td><td>Deals damage<br>Inflicts Locked (enemy cannot attack, special moves available)</td><td>No effect</td><td>Strength</td></tr> | |||
<tr><th>Lunge</th> | |||
<td>Opening Move</td><td>Deals damage<br>Inflict Stunned (skips enemy's turn)</td><td>Deals damage</td><td>Speed</td></tr> | |||
<tr><th>Rest</th> | |||
<td>Basic Move (once per battle)</td><td>Recovers HP<br>Skips enemy's turn<br>May recover Bleeding</td><td>No effect</td><td>N/A</td></tr> | |||
<tr><th>Rush</th> | |||
<td>Talent Opening Move</td><td>Inflicts Rush (+1 damage on all of your moves)</td><td>Cannot fail</td><td>N/A</td></tr> | |||
<tr><th>Shear</th> | |||
<td>Lock Move (use Latch to Lock enemy)</td><td>Deals damage<br>Inflict Bleeding (drains enemy HP)<br>Inflict Badly Bleeding (if Bleeding already applied, drains enemy HP quicker)</td><td>Deals damage</td><td>N/A</td></tr> | |||
<tr><th>Snap</th> | |||
<td>Locked Move (enemy inflicted Locked)</td><td>Deals damage<br>Recovers Locked status</td><td>No effect</td><td>Strength</td></tr> | |||
<tr><th>Snarl</th> | |||
<td>Opening Move</td><td>Inflicts Panic (+2 Rest/Wait)</td><td>No effect</td><td>N/A</td></tr> | |||
<tr><th>Tumble</th> | |||
<td>Talent Move (once per battle)</td><td>Dodge the next attack<br>Inflicts Tired (+2 Rest/Wait)<br></td><td>No effect</td><td>Agility</td></tr> | |||
<tr><th>Wait</th> | |||
<td>Basic Move (available after Resting once)</td><td>Skips your turn<br>Skips enemy's turn</td></td><td>Enemy gets extra move</td><td>N/A</td></tr> | |||
</table> | |||
The table below lists every battle move alongside their recommended and not recommended use cases. While the advantages and disadvantages listed can help you decide which moves you'd like to use when battling, we recommend checking out the [[Battling#Battle_Strategies|Battle Strategies]] portion of this page for some additional advice! | |||
'''Advantages''': The best cases in which you can use this move/when it's recommended that you use this move over others available, with modifier effect included in parenthesis | |||
'''Disadvantages''': The cases in which you should not use this move/when it's recommended that you choose another move instead, with modifier effect included in parenthesis | |||
<table class="tableA" style="width: 100%; font-size: 12px;"> | |||
<tr><th style="width: 10%;">Move</th><th style="width: 45%;">Advantages</th><th style="width: 45%;">Disadvantages</th></tr> | |||
<tr><th>Bite</th> | |||
<td>Equal effectiveness always</td><td>Equal effectiveness always</tr> | |||
<tr><th>Chase</th> | |||
<td>Prey enemy (+2)<br>Enemy equal or lower level than you<br>Enemy with lower Speed than you</td><td>Fearless enemy (-1)<br>Slow enemy (-2)<br>Enemy higher level than you<br>Enemy with higher Speed than you</td></tr> | |||
<tr><th>Flee</th> | |||
<td>Enemy equal or lower level than you<br>Enemy with lower Speed than you</td><td>Enemy higher level than you<br>Enemy with higher Speed than you</tr> | |||
<tr><th>Crush</th> | |||
<td>Enemy equal or lower level than you<br>Enemy with lower Strength than you</td><td>Enemy higher level than you<br>Enemy with higher Strength than you</tr> | |||
<tr><th>Escape</th> | |||
<td>Enemy equal or lower level than you<br>Enemy with lower Strength than you</td><td>Enemy higher level than you<br>Enemy with higher Strength than you</tr> | |||
<tr><th>Evade</th> | |||
<td>Equal effectiveness always</td><td>Equal effectiveness always</tr> | |||
<tr><th>Focus</th> | |||
<td>Group enemy (+1)<br>Enemy equal or lower level than you<br>Enemy with lower Smarts than you</td><td>Enemy higher level than you<br>Enemy with higher Smarts than you</td></tr> | |||
<tr><th>Latch</th> | |||
<td>Enemy equal or lower level than you<br>Enemy with lower Strength than you</td><td>Group enemy (-1)<br>Enemy higher level than you<br>Enemy with higher Strength than you</tr> | |||
<tr><th>Lunge</th> | |||
<td>Enemy equal or lower level than you<br>Enemy with lower Speed than you</td><td>Enemy higher level than you<br>Enemy with higher Speed than you</td></tr> | |||
<tr><th>Rest</th> | |||
<td>Prey enemy (+1)<br>Slow enemy (+1)<br>Panicked effect (+2)<br>Tired effect (+2)<br>Focused effect (+1)<br></td><td>Fearless enemy (-1)</tr> | |||
<tr><th>Rush</th> | |||
<td>Equal effectiveness always</td><td>Equal effectiveness always</tr> | |||
<tr><th>Shear</th> | |||
<td>Soft Skin enemy (+1)</td><td>Thick Skin enemy (-1)</tr> | |||
<tr><th>Snap</th> | |||
<td>Enemy equal or lower level than you<br>Enemy with lower Strength than you</td><td>Enemy higher level than you<br>Enemy with higher Strength than you</tr> | |||
<tr><th>Snarl</th> | |||
<td>Large Prey enemy (+1)<br>Small Prey enemy (+1)</td><td>Fearless enemy (-1)<br>Group enemy (-1)</tr> | |||
<tr><th>Tumble</th> | |||
<td>Enemy equal or lower level than you<br>Enemy with lower Agility than you</td><td>Enemy higher level than you<br>Enemy with higher Agility than you</tr> | |||
<tr><th>Wait</th> | |||
<td>Prey enemy (+1)<br>Slow enemy (+1)<br>Panicked effect (+2)<br>Tired effect (+2)<br>Focused effect (+1)<br></td><td>Fearless enemy (-1)</tr> | |||
</table> | |||
</div> | |||
<h3 class="c-header active">Battle Statuses</h3> | |||
<div class="c-content" style="display: block;"> | |||
=== Battle Statuses === | |||
There are a variety of effects which may be inflicted on you or the enemy during a battle. We'll cover all in the table below, alongside this quick description of what each column means! | |||
'''Subject''': Which party the status can be applied to (you, the enemy, or both) | |||
'''Effect''': What the status does | |||
'''Source''': How the status is applied | |||
'''Removal''': How the status is removed | |||
<table class="tableA" style="width: 100%; font-size: 12px;"> | |||
<tr><th style="width: 10%;">Status</th><th style="width: 20%;">Subject</th style="width: style="width: 20%;"><th>Effect</th><th style="width: 30%;">Source</th><th style="width: 20%;">Removal</th></tr> | |||
<tr><th>Badly Bleeding</td><td>You and Enemy</td><td>Significant HP loss every turn</td><td>Successful Bite while enemy Bleeding<br>Successful Shear while enemy Bleeding<br>Successful Crush while enemy Bleeding</td><td>Rest</td></tr> | |||
<tr><th>Bleeding</th><td>You and Enemy</td><td>HP loss every turn</td><td>Successful Bite<br>Successful Shear<br>Successful Crush</td><td>Rest</td></tr> | |||
<tr><th>Enraged</th><td>Enemy</td><td>-1 Latch<br>-1 Rest/Wait</td><td>Successful attack when enemy has low HP</td><td>N/A</td></tr> | |||
<tr><th>Evade</th><td>You</td><td>-1 damage to enemy's moves</td><td>Successful Evade</td><td>N/A</td></tr> | |||
<tr><th>Focus</th><td>You</td><td>Increased damage<br>+1 on Rest/Wait</td><td>Successful Focus</td><td>N/A</td></tr> | |||
<tr><th>Locked</th><td>You and Enemy</td><td>(You) Limited moves available<br>(Enemy) Cannot attack</td><td>Successful Latch</td><td>Escape (You)<br>Successful damaging move (Enemy)</td></tr> | |||
<tr><th>Panic</th><td>Enemy</td><td>+2 on Rest/Wait</td><td>Successful Snarl</td><td>N/A</td></tr> | |||
<tr><th>Rush</th><td>You</td><td>+1 damage to all of your move</td><td>Successful Rush</td><td>N/A</td></tr> | |||
<tr><th>Scattered</th><td>Enemy</td><td>Enemy deals less damage</td><td>Successful attack when enemy has low HP</td><td>N/A</td></tr> | |||
<tr><th>Stunned</th><td>Enemy</td><td>Enemy's move is skipped</td><td>Successful Lunge</td><td>Removed the next turn</td></tr> | |||
<tr><th>Tired</th><td>You and Enemy</td><td>(Enemy) +2 on Rest/Wait</td><td>(You) <10% Energy<br>(Enemy) Successful Chase<br>(Enemy) Successful Tumble</td><td>Rest</td></tr> | |||
</table> | |||
| Line 100: | Line 372: | ||
<h3 class="c-header active">Lucky Foots</h3> | <h3 class="c-header active">Lucky Foots</h3> | ||
<div class="c-content" style="display: block;"> | <div class="c-content" style="display: block;"> | ||
=== Lucky Foots === | === Lucky Foots === | ||
The <b>Lucky Foot</b> is a special item that can be used once per battle to increase your chances of landing a successful move. | |||
<center>[[File:luckyfoot.png]]</center> | |||
A Lucky Foot will <b>add a +1 modifier to each of your dice rolls</b>, meaning that it will be more likely for you to roll a success with every move that you make. Using a Lucky Foot will not guarantee that you win the battle, it will just help your chances a little bit! If you have at least one Lucky Foot in your unburied Hoard, you will be able to use it during battle by pressing the Luck! button on the right side of the interface. You can also use a Lucky Foot from your Hoard any time. If you have a Lucky Foot in effective outside of a battle, you'll be informed of this above any explore biome. | |||
<center>[[File:luckyfootbutton.png]]<br>[[File:luckyfootactive.png]]</center> | |||
Each Lucky Foot will only last <b>one battle</b>. If you win or a lose any battle, the Lucky Foot will expire. However, if you Flee from the battle, the Lucky Foot will remain in effect. If you apply a Lucky Foot before a battle, it will automatically be used during the next battle you start. There is no way to undo the use of a Lucky Foot after it's already been applied to a battle. | |||
Lucky Foots can be obtained primarily through exploring! Search for "Lucky Foot" on our [[Explore Encounters]] page to view all encounters that can drop the item. | |||
</div> | |||
</div> | </div> | ||
< | <h2 class="c-header active">Battling Strategies</h2> | ||
<div class="c-content" style="display: block;"> | <div class="c-content" style="display: block;"> | ||
== Battling Strategies == | |||
Battling can be overwhelming to understand, but strategies will make it easier to win! | |||
The overall easiest strategy you can use to win a battle is the <b>Bleed/Wait method</b>. This involves inflicting so much Bleed on the enemy that they are unable to land a successful attack, meaning that you can simply wait until they have fully bled out. You can succeed in this method in different ways depending on the modifiers of the enemy that you are battling, as some enemies will be weaker against certain moves. Do note that using this strategy is not a guaranteed way to win a battle, especially if the enemy is much higher level than you, but it can give you an advantage! | |||
We'll list a few types of enemies and the way that you can achieve a victory with the Bleed/Wait method below. You can view each enemy and their associated modifiers on the [[Battle Enemies]] pages. | |||
<table class="tableA" style="width: 100%; margin: auto;"> | |||
<tr><th style="width: 40%;">Modifier</th><th>Strategy</th></tr> | |||
<tr><th>If the enemy has the Soft Skin modifier...<br><i style="font-size: 10px;">Most birds, humans, small canines, and small felines</i></th><td style="text-align: left;">Alternate Bite and Latch until you get a successful Latch, and then spam <b>Shear</b> until you have inflicted Badly Bleeding on the enemy. Afterward, Rest and Wait until the enemy loses.</td></tr> | |||
<tr><th>If the enemy has the Group modifier...<br><i style="font-size: 10px;">Any enemy that comes in multiples like packs and herds</i></th><td style="text-align: left;">Use the opening move <b>Focus</b> if given the opportunity, and then spam Bite until you have inflicted Badly Bleeding on the enemy. Afterward, Rest and Wait until the enemy loses.</td></tr> | |||
<tr><th>If the enemy has the no modifiers...<br><i style="font-size: 10px;">Most individual wolves, large felines, and mustelids</i></th><td style="text-align: left;">Use the opening move <b>Snarl</b> if given the opportunity, and then spam Bite until you have inflicted Badly Bleeding on the enemy. Afterward, Rest and Wait until the enemy loses.</td></tr> | |||
<tr><th>If the enemy is a Bear or a Marine Mammal...</th><td style="text-align: left;">Use the opening move <b>Focus</b> if given the opportunity, and then spam Bite until you have inflicted Badly Bleeding on the enemy. Afterward, Rest and Wait until the enemy loses.</td></tr> | |||
<tr><th>If the enemy is a Prey Animal...<br><i>Most ungulates</th><td style="text-align: left;">Use the opening move <b>Chase</b> if given the opportunity, and then spam Bite until you have inflicted Badly Bleeding on the enemy. Afterward, Rest and Wait until the enemy loses. Use a Lucky Foot to guarantee the enemy cannot attack if needed.</td></tr> | |||
</table> | |||
< | <h3 class="c-header active">Knowing When to Flee</h3> | ||
<div class="c-content" style="display: block;"> | <div class="c-content" style="display: block;"> | ||
== | === Knowing When to Flee === | ||
Unless your lead is extremely powerful, it's unlikely that you'll win every battle you enter. Knowing when to flee a battle is an effective way of preserving energy and HP which would otherwise be wasted. | |||
If you've entered a battle and the enemy got the first move, then inflicted Bleed on your immediately, it may be a good idea to flee the battle before you take more damage. This is especially the case if your Bleed is not healed with a Rest. If the enemy was able to inflict Bleed on you during the first turn and you cannot heal from it, they are likely to win. | |||
If the enemy is hitting you hard and you have been unable to inflict any Bleed in the first few turns, and your HP is draining very quickly, it may be a good idea to flee before the enemy drains your HP first. If inflicting Bleed is unsuccessful early in the battle early in the battle, you may have a more difficult time catching up to the enemy. Keep a close eye on how quickly both of your HP are draining, and flee if it appears that yours will drain first. | |||
Fleeing from a battle will recover some energy, but never more than you used during the battle. However, if your flee roll is unsuccessful, the enemy may land an attack on you as you are fleeing, causing you to lose a few HP right before the battle ends. | |||
</div> | |||
</div> | </div> | ||
<h2 class="c-header active">Battle Talents</h2> | <h2 class="c-header active">Battle Talents</h2> | ||
<div class="c-content" style="display: block;"> | <div class="c-content" style="display: block;"> | ||
== Battle Talents == | == Battle Talents == | ||
There are multiple talents you can apply to your lead wolf to aid in your battling! Some of these talents make moves more effective, some make your enemy weaker, some give you access to special moves, while others increase your rewards from a victorious battle. You can apply a talent to your lead wolf from the [https://www.wolvden.com/talents Talents] page. You'll gain talent points as your lead wolf levels up past Level 5. Learn more about talents on the [[Talents]] page! | |||
{{ItemGrid}} | |||
{{Talent|toughness|Toughness|+2 max HP.}} | |||
{{Talent|thickskin|Thick Skin|+3 max HP. Requires chained talent Toughness be equipped before applying.}} | |||
{{Talent|hardy|Hardy|Regain up to 5 HP after battle ends. Required chained talents Toughness and Thick Skin be equipped before applying.}} | |||
{{Talent|latcher|Latcher|Increased chance to Latch in battle. Decreased chance to cause bleeding with Shear and Crush.}} | |||
{{Talent|tacticalretreat|Tactical Retreat|Increased chance to safely flee from battle.}} | |||
{{Talent|tireless|Tireless|Victorious battles return 25% of the energy used.}} | |||
{{Talent|secondwind|Second Wind|Resting in battle always restores at least 1 point of energy used, and is more likely to remove tiredness. Requires chained talent Tireless be equipped before applying.}} | |||
{{Talent|quickrecovery|Quick Recovery|Resting in battle restores up to 3 more HP. Requires chained talent Tireless be equipped before applying.}} | |||
{{Talent|rush|Rush|Special Opening Move; -8 Energy to guarantee a +1 increase in damage until the end of the battle. Requires minimum lead wolf Level 10. Requires chained talents Tireless and Second Wind be equipped before applying.}} | |||
{{Talent|bloodthirsty|Bloodthirsty|Both you and your opponents suffer increased damage from Bleeding. Requires chained talents Tireless and Quick Recovery be equipped before applying.}} | |||
{{Talent|ambush|Ambush|50% chance to gain +1 bonus to initiative rolls.}} | |||
{{Talent|nimble|Nimble|Higher chance to free yourself from lock/snare. Requires chained talent Ambush be equipped before applying.}} | |||
{{Talent|cunning|Cunning|Increase the chance of evading special attacks. Requires chained talent Ambush be equipped before applying.}} | |||
{{Talent|evade|Evade|Special Opening Move; -6 Energy to guarantee a +1 reduction in damage taken until the end of the battle. Requires chained talents Ambush and Nimble be equipped before applying.}} | |||
{{Talent|tumble|Tumble|Special Move; -4 Energy for a chance to dodge the next attack and tire down slow or enraged opponents. Usable once per battle. Requires chained talents Ambush and Cunning be equipped before applying.}} | |||
{{Talent|scavenger|Scavenger|Additional 5% chance to get a trophy from battles.}} | |||
{{Talent|biter|Biter|+1 damage with Bite. Decreased chance to cause bleeding with Bite.}} | |||
{{Talent|dauntless|Dauntless|Extra damage in battles vs powerful enemies. Requires chained talent Biter be equipped before applying.}} | |||
{{EndItemGrid}} | |||
</div> | </div> | ||
| Line 127: | Line 479: | ||
<h2 class="c-header active">Achievements</h2> | <h2 class="c-header active">Achievements</h2> | ||
<div class="c-content" style="display: block;"> | <div class="c-content" style="display: block;"> | ||
== Achievements == | == Achievements == | ||
There are a variety of achievements you can earn from battling. You can find them all in the [https://www.wolvden.com/achievements/battling Battling tab of the Achievements page]! While none of these achievements grant rewards, they may be fun for you to collect. | |||
{{ItemGrid}} | |||
{{Achievement|[[File:achievement_battling.png]]|Champion|Win 100 battles.|}} | |||
{{Achievement|[[File:achievement_battling.png]]|Gladiator|Win 500 battles.|}} | |||
{{Achievement|[[File:achievement_battling.png]]|Battlemaster|Win 1000 battles.|}} | |||
{{Achievement|[[File:achievement_battling.png]]|Lucky Streak|Win 10 battles in a row.|}} | |||
{{Achievement|[[File:achievement_battling.png]]|Trophy Hunter|Collect 10 trophies in battle.|}} | |||
{{Achievement|[[File:achievement_battling.png]]|Trophy Hunter II|Collect 50 trophies in battle.|}} | |||
{{Achievement|[[File:achievement_battling.png]]|Trophy Hunter III|Collect 100 trophies in battle.|}} | |||
{{Achievement|[[File:achievement_battling.png]]|Trophy Hunter IV|Collect 500 trophies in battle.|}} | |||
{{Achievement|[[File:achievement_battling.png]]|Float Like a Butterfly|Win a battle with 90% or more HP remaining.|}} | |||
{{Achievement|[[File:achievement_battling.png]]|String Like a Bee|Deal 9 points of damage in one attack.|}} | |||
{{EndItemGrid}} | |||
</div> | </div> | ||
[[Category:Battling]] | |||
Latest revision as of 20:15, 3 June 2025
Battling is a primary mechanic on Wolvden which you'll encounter frequently while exploring! Battling is often required for progressing in events, unlocking content, and collecting useful items, so it's an important feature to understand. The mechanic is complex, so we'll go over the way it works and some tips for succeeding on this page!
If you're looking for details about every battle enemy, we recommend checking out the Battle Enemies page. This page will just cover the mechanics of battling itself.
| Table of Contents |
|---|
| Links not working? Sections must be expanded to jump to a subheader within them! |
| Battling |
| Battle Enemies |
| Interface |
| Battling Process |
| Battling Moves |
| Battle Statuses |
| Lucky Foots |
| Battling Strategies |
| Battle Talents |
| Achievements |
| Battle Enemy Masterlists |
Battling
Battling
While exploring, you'll frequently come across battle enemies you can fight for a chance to win rewards! The battle enemies you can find are different in every biome, with some overlap, and some enemies are exclusive to events. You can find lists of all battle enemies from the Battle Enemies page.

It's not required to fight battle enemies, but your progression in the game may be limited if you do not. Winning battles gives your lead experience points, which helps you level up and unlock more features, like chased wolves and raffle studs. Battling also drops useful items like meat chunks for food, healing salves for healing, and trophy items for crafting. During some events, battling is required to progress in the storylines.
Battling uses energy and health points (HP) from your lead wolf, both which you can view in the sidebar panel underneath your lead wolf's profile picture on any page. While you can still battle without any energy, your moves will have a lower chance of landing. Any battle started while you're at 0 HP will automatically end immediately, so make sure that you're healing up regularly! Clicking on the medicine pouch highlighted below will allow you to quickly access your healing salves while you're exploring, so you can heal up before any battle.

Your lead wolf's stats play a large role in battle success. Lower-stat leads typically have a more difficult time defeating enemies, especially high-level enemies. Having as high a stat value in every stat as you can, except for Wisdom, will contribute greatly to your battle wins! Wisdom is not used for any battle moves or rolls, so don't worry about keeping this stat up the same as the other ones.
Battle Enemies
Battle Enemies
There are a large variety of battle enemies available to fight, with some being limited to events and biomes. Each enemy has its own specifics that make battling them unique. You can find full lists of all battle enemies from the Battle Enemies page.
Each enemy has a few attributes that you can consider before starting the battle: level, stats, modifiers, and trophy drops.
You can view the level of most enemies before entering the battle with them. This can help give you an idea of how difficult the battle will be! An enemy with a level much higher than yours will typically be more difficult for you to defeat. Enemies can be level 1 to level 25, with the levels above 20 being reserved for boss enemies and one specific explore encounter (keep moving forward against the small critters to encounter a wolf always 5 levels above your level).

Each enemy has a set of associated stats that it uses in battle and that it can drop upon defeat. These stats are different for each enemy, but there are some general trends. For example, all bear enemies use and drop Strength, while fox enemies use and drop Agility and Smarts. All enemies can drop the Wisdom stat, but no enemies use the Wisdom stat in battle. If you're looking for specific stats to gain on your lead wolf, you can target enemies that you know will only drop specific stats. Otherwise, you can target enemies that you know use a stat that your lead wolf is very proficient in to aid your chance of beating them. The Battle Enemies pages list the stats that we know about for every battle enemy.
Many battle enemies, but not all, have a set of modifiers that influence how different battle moves affect them. These modifiers are based on the type of animal you are fighting, and could benefit either you or the enemy. You'll always be able to view the effects of modifiers in battle by hovering over or tapping on the dice rolls in the battle log next to each move that you make. A list of all enemy modifiers is available below, and the modifiers we're aware of for every battle enemy are available on the Battle Enemies pages.
| Modifier | Effects |
|---|---|
| Fearless | -1 on Rest/Wait
-1 on Chase -1 on Snarl |
| Group | +1 on Focus
-1 on Latch -1 on Snarl -1 on Snap -1 on Tumble |
| Large Prey | +1 on Snarl |
| Prey | +1 on Rest/Wait
+2 on Chase +2 on Retreat |
| Small Prey | +1 on Snarl |
| Slow | +1 on Rest/Wait
+1 on Retreat +1 on Tumble -2 on Chase |
| Soft Skin | +1 on Shear |
| Strong Venom | Enemy gets +1 on its bite attacks |
| Thick Skin | -1 on Shear |
Each enemy also has a set collection of potential trophy drops that can be dropped rarely upon defeat. In order to start collecting trophies from enemies, your lead wolf must be at least level 10. After that, you can collect items from defeating enemies Level 5 and higher while exploring, many of which can be used for crafting! Many crafting recipes are available as trophy drops, as well. The Battle Enemies pages contain all of the trophy items that we are aware of for each enemy.


Interface
Interface
The battling interface is pretty straightforward, but it will change throughout the course of the battle, so it's nice to know what you'll be looking at! Entering a battle will display the enemy you've opted to fight front and center, with some stats and moves available around them.

At the top left, you'll find your lead wolf's HP. The top right contains the enemy's HP. These bars will move around as you're battling and each of you is losing or gaining HP.
In the center of the screen, you'll find your available battle moves. The moves that are available to you depend on a few factors. If you win the initiative roll at the beginning of the battle, you'll have access to the some opening moves which you can use only on the first turn of the battle. We explain opening moves in detail in the Battling Process part of this page. For most of the battle, you'll have access to generic moves: Bite, Latch, Rest, and Flee. Using Latch has a chance to grab onto the enemy, allowing you access to three more moves: Shear, Crush, and Release. If the enemy has grabbed onto you, you'll be limited in the amount of moves you can use while you're trying to escape. Finally, if you have one of the lead wolf Talents granting a special move, a special move might be available to you as an opening move or limited once-per-battle move. Since each battle move has its own specifics, we'll cover these in the Battle Moves section of this page.
Underneath your available move set, you'll find a step-by-step log of every move that's been taken in battle. This is a very useful resource if you want to get into the intricacies of battle mechanics. These logs can help you understand battle enemy specifics and refine the moves you're using to better fit the enemy that you're fighting. Green text indicates that it's a move that you've made, while red text indicates that it's a move your enemy has made. There are a few parts to this menu.

On the left side of the log, you'll find a dice icon. As we explain in the Battling Process section of this page, the success of every move is based on a dice roll. You can view the dice rolled for each move by hovering over or tapping on the icon on the left side of the associated log. Hovering over this dice will reveal any modifiers that were applied to the dice roll because of stats, enemy characteristics, statuses, or talents. For example, in the screenshot above, the dice roll applied to this move determined the chance for the move to inflict the effect Bleeding on this enemy. The bite move received a -1 base modifier as all bite attacks do, as well as a -1 Biter modifier from the Biter talent, which increases damage caused by the move but decreases the chance for the bite to inflict Bleeding. Since it didn't roll higher than 3, the cutoff for a successful move, the bite did not inflict Bleeding.
On the right side of the log, you may occasionally see a status indicator. In the screenshot above, the double down arrows indicate that the enemy is losing the status Locked by breaking free from the hold. Double up arrows would indicate that the enemy has gained that status. As another example, the enemy below has gained the status Bleeding after a successful Shear dice roll. We detail all battle statuses in the Battle Statuses section of this page.

Causing your enemy to bleed is a very useful tactic when battling. We recommend you keep an eye out for any time that this occurs!
Battling Process
Battling Process
Battling is a turn-based mechanic, meaning that you and the enemy take turns making moves. The process of any battle can be broken down into a few steps: the initiative roll/opening move, the main battle, and the results. We'll go through each of these steps in detail here.
Initiative Rolls and Opening Moves
When you enter a battle with any enemy, an initiative is immediately rolled determining which of you gets to attack first. This dice roll is influenced by a specific stat which is randomized between all of an enemy's possible associated stats. An enemy's initiative roll stats are the same stats that it can drop after being defeated, with the exception of Wisdom, since Wisdom is never used in battle (but can be dropped by defeating any enemy). For example, the Bobcat's associated stats are Agility and Smarts, so its initiative roll will be influenced by either Agility or Smarts. The initiative roll is not influenced by applying a Lucky Foot before the battle. You can view all enemy stats on the battle enemy pages available from the main Battle Enemies page.

If you enter the battle with a lower value of the initiative stat than the enemy you're facing, your initiative dice roll will receive a -1 modifier like in the example above, making it less likely that you will receive the first move. It's difficult to know before the battle if the enemy has higher stats than you, since it's not labeled anywhere. Generally, an enemy with a higher level than you will have higher stats than you, and more challenging enemies like bears and bosses will also have generally higher stats. The lead wolf talent Ambush adds +1 to any initiative dice roll, making your chance to win the initiative slightly higher.
If the intiative dice roll is successful (>3), you will be permitted to act first and use an opening move. If it's unsuccessful (<4), the enemy will make the first move.
Opening moves are the same in every battle. By default, if you win the opening move, you will be able to choose between Snarl, Focus, Lunge, and Chase. The efficiency of these moves will depend partly on the enemy's modifiers, explained in the Battle Enemies section of this page. They will also be affected by your lead wolf's stats! There are also some opening moves that can be added using lead wolf Talents. Evade and Rush are talent opening moves that affect the amount of damage done for the rest of the battle. Since every battle move has its own specifics, we'll cover these in the Battle Moves section of this page. Choosing the right opening move can contribute to your victory in the battle!
The Main Battle
Throughout the remainder of the battle, you and the enemy will take turns making moves until one of you runs out of HP or you flee the battle. You can keep track of what's happening in the battle log at the bottom of the battling screen.
The success of each move is dependent on a dice roll. You can view your dice rolls in the battle log, while the enemy’s rolls are hidden. Rolling higher than 3 results in a successful move and rolling lower than 4 results in a failed move. There are moves that are more effective against certain enemies and with certain battle statuses, which you can use to give yourself an advantage during this main battle stage. Since every move has its own specifics, we'll cover all of them in the Battle Moves section of this page.
If you'd like to leave the battle at any time, such as when you've realized that you cannot win, you can choose to Flee as long as the enemy doesn't have you Locked. There's a small chance that the enemy will be able to land a final attack on your as you're fleeing, costing you more damage!Battles which you have fled from will not be counted in your lead wolf's total battle or lost battle stats, it will be as though the battle never happened.

Throughout the battle, you will also have the option to apply a Lucky Foot to the battle if you have one available in your Hoard and you do not already have one applied. Lucky Foots automatically add a +1 modifier to every move that you make in the battle.
Battle Results
Congratulations on a completed battle! At this point, you've either won or lost against the battle enemy. Either way, there's things to be gained.
Winning a battle will always reward you with experience points for your lead wolf. If your lead wolf is already the max level 20, this experience will not be counted. There's chance that any victorious battle will reward ![]() Silver Cones, Meat Chunks, or Medicine: Healing Salves, as well!
Silver Cones, Meat Chunks, or Medicine: Healing Salves, as well!
If your lead wolf is level 10 or higher and the enemy is level 5 or higher, trophies are a potential additional drop from enemies, rewarding you with a rare enemy-specific item like a skull, pelt, or recipe.
Enemies may also drop a stat point, with the stat dropped corresponding to the enemy battled. For lead wolves level 1-17, stat points can drop from enemies higher level than the lead or within three levels lower. For lead wolves level 18-20, stats can drop from enemies level 15 and higher.


Losing a battle typically doesn't grant you any reward, but there are some rare cases in which it could! Rarely, your lead wolf might gain an affliction such as Open Wound or Poison after losing a battle. When losing a battle against any Lunar enemy, there's a small chance that you'll be granted a special Lunar recipe! The Lunar Battle Enemies page lists the potential drops from losing to a Lunar enemy.

Battling Moves
Battling Moves
There are many moves that are available for you to use during battle, each with their own stat influences, effects, and modifier changes. We've included each in the table below with a quick explanation of each column here. Further down in the section, you'll find an additional table detailing environments that each move is best used in.
Availability: Indicates when the move is available for you to use
Stat: The stat associated with the move, if any. When a move has an associated stat, you will receive modifiers on your dice roll for that move based on your enemy's stats. If the enemy has a higher stat than you, you will receive a negative modifier on this move, while you will receive a positive modifier if you have a higher stat than the enemy
Successful Roll: The effect that a successful roll of this move has, with descriptions of the effect in parenthesis
Fail Roll: The effect that an unsuccessful roll of this move has, with descriptions of the effect in paranthesis
| Move | Availability | Successful Roll | Fail Roll | Stat |
|---|---|---|---|---|
| Bite | Basic Move | Deals damage Inflict Bleeding (drains enemy HP) Inflict Badly Bleeding (if Bleeding already applied, drains enemy HP quicker) | Deals damage | N/A |
| Chase | Opening Move | Inflicts Tired (+2 Rest/Wait) | No effect | Speed |
| Crush | Lock Move (use Latch to Lock enemy) | Deals damage Inflict Bleeding (drains enemy HP) Inflict Badly Bleeding (if Bleeding already applied, drains enemy HP quicker) | Deals damage | Strength |
| Escape | Locked Move (enemy inflicted Locked) | Recovers Locked status | No effect | Strength |
| Evade | Talent Opening Move | Inflicts Evade (-1 damage on all of the enemy's move) | Cannot fail | N/A |
| Flee | Basic Move | Ends the battle | Ends the battle, but lose some HP | Speed |
| Focus | Opening Move | Inflicts Focus (Increased damage, +1 Rest/Wait) | No effect | Smarts |
| Latch | Basic Move | Deals damage Inflicts Locked (enemy cannot attack, special moves available) | No effect | Strength |
| Lunge | Opening Move | Deals damage Inflict Stunned (skips enemy's turn) | Deals damage | Speed |
| Rest | Basic Move (once per battle) | Recovers HP Skips enemy's turn May recover Bleeding | No effect | N/A |
| Rush | Talent Opening Move | Inflicts Rush (+1 damage on all of your moves) | Cannot fail | N/A |
| Shear | Lock Move (use Latch to Lock enemy) | Deals damage Inflict Bleeding (drains enemy HP) Inflict Badly Bleeding (if Bleeding already applied, drains enemy HP quicker) | Deals damage | N/A |
| Snap | Locked Move (enemy inflicted Locked) | Deals damage Recovers Locked status | No effect | Strength |
| Snarl | Opening Move | Inflicts Panic (+2 Rest/Wait) | No effect | N/A |
| Tumble | Talent Move (once per battle) | Dodge the next attack Inflicts Tired (+2 Rest/Wait) | No effect | Agility |
| Wait | Basic Move (available after Resting once) | Skips your turn Skips enemy's turn | Enemy gets extra move | N/A |
The table below lists every battle move alongside their recommended and not recommended use cases. While the advantages and disadvantages listed can help you decide which moves you'd like to use when battling, we recommend checking out the Battle Strategies portion of this page for some additional advice!
Advantages: The best cases in which you can use this move/when it's recommended that you use this move over others available, with modifier effect included in parenthesis
Disadvantages: The cases in which you should not use this move/when it's recommended that you choose another move instead, with modifier effect included in parenthesis
| Move | Advantages | Disadvantages |
|---|---|---|
| Bite | Equal effectiveness always | Equal effectiveness always |
| Chase | Prey enemy (+2) Enemy equal or lower level than you Enemy with lower Speed than you | Fearless enemy (-1) Slow enemy (-2) Enemy higher level than you Enemy with higher Speed than you |
| Flee | Enemy equal or lower level than you Enemy with lower Speed than you | Enemy higher level than you Enemy with higher Speed than you |
| Crush | Enemy equal or lower level than you Enemy with lower Strength than you | Enemy higher level than you Enemy with higher Strength than you |
| Escape | Enemy equal or lower level than you Enemy with lower Strength than you | Enemy higher level than you Enemy with higher Strength than you |
| Evade | Equal effectiveness always | Equal effectiveness always |
| Focus | Group enemy (+1) Enemy equal or lower level than you Enemy with lower Smarts than you | Enemy higher level than you Enemy with higher Smarts than you |
| Latch | Enemy equal or lower level than you Enemy with lower Strength than you | Group enemy (-1) Enemy higher level than you Enemy with higher Strength than you |
| Lunge | Enemy equal or lower level than you Enemy with lower Speed than you | Enemy higher level than you Enemy with higher Speed than you |
| Rest | Prey enemy (+1) Slow enemy (+1) Panicked effect (+2) Tired effect (+2) Focused effect (+1) | Fearless enemy (-1) |
| Rush | Equal effectiveness always | Equal effectiveness always |
| Shear | Soft Skin enemy (+1) | Thick Skin enemy (-1) |
| Snap | Enemy equal or lower level than you Enemy with lower Strength than you | Enemy higher level than you Enemy with higher Strength than you |
| Snarl | Large Prey enemy (+1) Small Prey enemy (+1) | Fearless enemy (-1) Group enemy (-1) |
| Tumble | Enemy equal or lower level than you Enemy with lower Agility than you | Enemy higher level than you Enemy with higher Agility than you |
| Wait | Prey enemy (+1) Slow enemy (+1) Panicked effect (+2) Tired effect (+2) Focused effect (+1) | Fearless enemy (-1) |
Battle Statuses
Battle Statuses
There are a variety of effects which may be inflicted on you or the enemy during a battle. We'll cover all in the table below, alongside this quick description of what each column means!
Subject: Which party the status can be applied to (you, the enemy, or both)
Effect: What the status does
Source: How the status is applied
Removal: How the status is removed
| Status | Subject | Effect | Source | Removal |
|---|---|---|---|---|
| Badly Bleeding | You and Enemy | Significant HP loss every turn | Successful Bite while enemy Bleeding Successful Shear while enemy Bleeding Successful Crush while enemy Bleeding | Rest |
| Bleeding | You and Enemy | HP loss every turn | Successful Bite Successful Shear Successful Crush | Rest |
| Enraged | Enemy | -1 Latch -1 Rest/Wait | Successful attack when enemy has low HP | N/A |
| Evade | You | -1 damage to enemy's moves | Successful Evade | N/A |
| Focus | You | Increased damage +1 on Rest/Wait | Successful Focus | N/A |
| Locked | You and Enemy | (You) Limited moves available (Enemy) Cannot attack | Successful Latch | Escape (You) Successful damaging move (Enemy) |
| Panic | Enemy | +2 on Rest/Wait | Successful Snarl | N/A |
| Rush | You | +1 damage to all of your move | Successful Rush | N/A |
| Scattered | Enemy | Enemy deals less damage | Successful attack when enemy has low HP | N/A |
| Stunned | Enemy | Enemy's move is skipped | Successful Lunge | Removed the next turn |
| Tired | You and Enemy | (Enemy) +2 on Rest/Wait | (You) <10% Energy (Enemy) Successful Chase (Enemy) Successful Tumble | Rest |
Lucky Foots
Lucky Foots
The Lucky Foot is a special item that can be used once per battle to increase your chances of landing a successful move.

A Lucky Foot will add a +1 modifier to each of your dice rolls, meaning that it will be more likely for you to roll a success with every move that you make. Using a Lucky Foot will not guarantee that you win the battle, it will just help your chances a little bit! If you have at least one Lucky Foot in your unburied Hoard, you will be able to use it during battle by pressing the Luck! button on the right side of the interface. You can also use a Lucky Foot from your Hoard any time. If you have a Lucky Foot in effective outside of a battle, you'll be informed of this above any explore biome.


Each Lucky Foot will only last one battle. If you win or a lose any battle, the Lucky Foot will expire. However, if you Flee from the battle, the Lucky Foot will remain in effect. If you apply a Lucky Foot before a battle, it will automatically be used during the next battle you start. There is no way to undo the use of a Lucky Foot after it's already been applied to a battle.
Lucky Foots can be obtained primarily through exploring! Search for "Lucky Foot" on our Explore Encounters page to view all encounters that can drop the item.
Battling Strategies
Battling Strategies
Battling can be overwhelming to understand, but strategies will make it easier to win!
The overall easiest strategy you can use to win a battle is the Bleed/Wait method. This involves inflicting so much Bleed on the enemy that they are unable to land a successful attack, meaning that you can simply wait until they have fully bled out. You can succeed in this method in different ways depending on the modifiers of the enemy that you are battling, as some enemies will be weaker against certain moves. Do note that using this strategy is not a guaranteed way to win a battle, especially if the enemy is much higher level than you, but it can give you an advantage!
We'll list a few types of enemies and the way that you can achieve a victory with the Bleed/Wait method below. You can view each enemy and their associated modifiers on the Battle Enemies pages.
| Modifier | Strategy |
|---|---|
| If the enemy has the Soft Skin modifier... Most birds, humans, small canines, and small felines | Alternate Bite and Latch until you get a successful Latch, and then spam Shear until you have inflicted Badly Bleeding on the enemy. Afterward, Rest and Wait until the enemy loses. |
| If the enemy has the Group modifier... Any enemy that comes in multiples like packs and herds | Use the opening move Focus if given the opportunity, and then spam Bite until you have inflicted Badly Bleeding on the enemy. Afterward, Rest and Wait until the enemy loses. |
| If the enemy has the no modifiers... Most individual wolves, large felines, and mustelids | Use the opening move Snarl if given the opportunity, and then spam Bite until you have inflicted Badly Bleeding on the enemy. Afterward, Rest and Wait until the enemy loses. |
| If the enemy is a Bear or a Marine Mammal... | Use the opening move Focus if given the opportunity, and then spam Bite until you have inflicted Badly Bleeding on the enemy. Afterward, Rest and Wait until the enemy loses. |
| If the enemy is a Prey Animal... Most ungulates | Use the opening move Chase if given the opportunity, and then spam Bite until you have inflicted Badly Bleeding on the enemy. Afterward, Rest and Wait until the enemy loses. Use a Lucky Foot to guarantee the enemy cannot attack if needed. |
Knowing When to Flee
Knowing When to Flee
Unless your lead is extremely powerful, it's unlikely that you'll win every battle you enter. Knowing when to flee a battle is an effective way of preserving energy and HP which would otherwise be wasted.
If you've entered a battle and the enemy got the first move, then inflicted Bleed on your immediately, it may be a good idea to flee the battle before you take more damage. This is especially the case if your Bleed is not healed with a Rest. If the enemy was able to inflict Bleed on you during the first turn and you cannot heal from it, they are likely to win.
If the enemy is hitting you hard and you have been unable to inflict any Bleed in the first few turns, and your HP is draining very quickly, it may be a good idea to flee before the enemy drains your HP first. If inflicting Bleed is unsuccessful early in the battle early in the battle, you may have a more difficult time catching up to the enemy. Keep a close eye on how quickly both of your HP are draining, and flee if it appears that yours will drain first.
Fleeing from a battle will recover some energy, but never more than you used during the battle. However, if your flee roll is unsuccessful, the enemy may land an attack on you as you are fleeing, causing you to lose a few HP right before the battle ends.
Battle Talents
Battle Talents
There are multiple talents you can apply to your lead wolf to aid in your battling! Some of these talents make moves more effective, some make your enemy weaker, some give you access to special moves, while others increase your rewards from a victorious battle. You can apply a talent to your lead wolf from the Talents page. You'll gain talent points as your lead wolf levels up past Level 5. Learn more about talents on the Talents page!
| Toughness | |
 | +2 max HP. |
| Thick Skin | |
 | +3 max HP. Requires chained talent Toughness be equipped before applying. |
| Hardy | |
 | Regain up to 5 HP after battle ends. Required chained talents Toughness and Thick Skin be equipped before applying. |
| Latcher | |
 | Increased chance to Latch in battle. Decreased chance to cause bleeding with Shear and Crush. |
| Tactical Retreat | |
 | Increased chance to safely flee from battle. |
| Tireless | |
 | Victorious battles return 25% of the energy used. |
| Second Wind | |
 | Resting in battle always restores at least 1 point of energy used, and is more likely to remove tiredness. Requires chained talent Tireless be equipped before applying. |
| Quick Recovery | |
 | Resting in battle restores up to 3 more HP. Requires chained talent Tireless be equipped before applying. |
| Rush | |
 | Special Opening Move; -8 Energy to guarantee a +1 increase in damage until the end of the battle. Requires minimum lead wolf Level 10. Requires chained talents Tireless and Second Wind be equipped before applying. |
| Bloodthirsty | |
 | Both you and your opponents suffer increased damage from Bleeding. Requires chained talents Tireless and Quick Recovery be equipped before applying. |
| Ambush | |
 | 50% chance to gain +1 bonus to initiative rolls. |
| Nimble | |
 | Higher chance to free yourself from lock/snare. Requires chained talent Ambush be equipped before applying. |
| Cunning | |
 | Increase the chance of evading special attacks. Requires chained talent Ambush be equipped before applying. |
| Evade | |
 | Special Opening Move; -6 Energy to guarantee a +1 reduction in damage taken until the end of the battle. Requires chained talents Ambush and Nimble be equipped before applying. |
| Tumble | |
 | Special Move; -4 Energy for a chance to dodge the next attack and tire down slow or enraged opponents. Usable once per battle. Requires chained talents Ambush and Cunning be equipped before applying. |
| Scavenger | |
 | Additional 5% chance to get a trophy from battles. |
| Biter | |
 | +1 damage with Bite. Decreased chance to cause bleeding with Bite. |
| Dauntless | |
 | Extra damage in battles vs powerful enemies. Requires chained talent Biter be equipped before applying. |
Achievements
Achievements
There are a variety of achievements you can earn from battling. You can find them all in the Battling tab of the Achievements page! While none of these achievements grant rewards, they may be fun for you to collect.
| Champion | |
 | Win 100 battles. |
| Gladiator | |
| Win 500 battles. |
| Battlemaster | |
| Win 1000 battles. |
| Lucky Streak | |
| Win 10 battles in a row. |
| Trophy Hunter | |
| Collect 10 trophies in battle. |
| Trophy Hunter II | |
| Collect 50 trophies in battle. |
| Trophy Hunter III | |
| Collect 100 trophies in battle. |
| Trophy Hunter IV | |
| Collect 500 trophies in battle. |
| Float Like a Butterfly | |
| Win a battle with 90% or more HP remaining. |
| String Like a Bee | |
| Deal 9 points of damage in one attack. |