
Coigreach: Difference between revisions
From Grouse House Wiki
| (5 intermediate revisions by the same user not shown) | |||
| Line 124: | Line 124: | ||
In order to complete the storyline, '''players are required to rollover at least | In order to complete the storyline, '''players are required to rollover at least 3 times'''. There is a 1-rollover waiting period after the first part of chapter one and another 1-rollover waiting period at the end of chapter one. In the middle of part 2 of the storylinw, another 1-rollove waiting period is required. Between these, chapters open up on specific dates. Chapter Three begins on November 5th, Chapter Four begins on November 10th, and Chapter Five begins on November 15th. You can start the storyline any time after these dates, as long as you allow yourself about a week before the end of November to complete the rollover waiting periods and find storyline explore encounters. The storyline expansion begins on 20th November. | ||
| Line 131: | Line 131: | ||
<h2 class="c-header active">Exploring</h2> | <h2 class="c-header active">Exploring</h2> | ||
<div class="c-content" style="display: block;"> | <div class="c-content" style="display: block;"> | ||
== Exploring == | == Exploring == | ||
In order to progress in the event's storyline and collect currency for the shop, you must explore. Many new, event-exclusive explore encounters begin showing up as soon as November starts! | In order to progress in the event's storyline and collect currency for the shop, you must explore. Many new, event-exclusive explore encounters begin showing up as soon as November starts! | ||
| Line 184: | Line 185: | ||
<center>'''Tier 1'''<br><i>Unlocked on 5th | <center>'''Tier 1'''<br><i>Unlocked on November 5th</i></center> | ||
{{ShopContent}} | {{ShopContent}} | ||
{{ | {{CoigreachDecorAll|Bull Septum|Bull Septum|2|b/bb|Bullseptum}} | ||
{{ | {{CoigreachDecorAll|Carved Round Earrings|Carved Round Earrings|2|c/cc|Carvedroundearrings}} | ||
{{ | {{CoigreachDecorAll|Stiff Braid Anklets [Copper]|Stiff Braid Anklets [Copper]|4|s/ss|Stiffbraidankletscopper}} | ||
{{ | {{CoigreachDecorAll|Stiff Braid Anklets [Gold]|Stiff Braid Anklets [Gold]|4|s/ss|Stiffbraidankletsgold}} | ||
{{ | {{CoigreachDecorAll|Stiff Braid Anklets [Silver]|Stiff Braid Anklets [Silver]|4|s/ss|Stiffbraidankletssilver}} | ||
{{ | {{CoigreachDecorAll|Stiff Braid Bracelets [Copper]|Stiff Braid Bracelets [Copper]|4|s/ss|Stiffbraidbraceletscopper}} | ||
{{ | {{CoigreachDecorAll|Stiff Braid Bracelets [Gold]|Stiff Braid Bracelets [Gold]|4|s/ss|Stiffbraidbraceletsgold}} | ||
{{ | {{CoigreachDecorAll|Stiff Braid Bracelets [Silver]|Stiff Braid Bracelets [Silver]|4|s/ss|Stiffbraidbraceletssilver}} | ||
{{ | {{CoigreachDecorAll|Stiff Braid Headwrap [Copper]|Stiff Braid Headwrap [Copper]|4|s/ss|Stiffbraidheadwrapcopper}} | ||
{{ | {{CoigreachDecorAll|Stiff Braid Headwrap [Gold]|Stiff Braid Headwrap [Gold]|4|s/ss|Stiffbraidheadwrapgold}} | ||
{{ | {{CoigreachDecorAll|Stiff Braid Headwrap [Silver]|Stiff Braid Headwrap [Silver]|4|s/ss|Stiffbraidheadwrapsilver}} | ||
{{ | {{CoigreachDecorAll|Stiff Braid Necklace [Copper]|Stiff Braid Necklace [Copper]|4|s/ss|Stiffbraidnecklacecopper}} | ||
{{ | {{CoigreachDecorAll|Stiff Braid Necklace [Gold]|Stiff Braid Necklace [Gold]|4|s/ss|Stiffbraidnecklacegold}} | ||
{{ | {{CoigreachDecorAll|Stiff Braid Necklace [Silver]|Stiff Braid Necklace [Silver]|4|s/ss|Stiffbraidnecklacesilver}} | ||
{{ | {{CoigreachDecorAll|Stiff Braid Tailwrap [Copper]|Stiff Braid Tailwrap [Copper]|4|s/ss|Stiffbraidtailwrapcopper}} | ||
{{ | {{CoigreachDecorAll|Stiff Braid Tailwrap [Gold]|Stiff Braid Tailwrap [Gold]|4|s/ss|Stiffbraidtailwrapgold}} | ||
{{ | {{CoigreachDecorAll|Stiff Braid Tailwrap [Silver]|Stiff Braid Tailwrap [Silver]|4|s/ss|Stiffbraidtailwrapsilver}} | ||
{{ | {{CoigreachDecorAll|Smoky Quartz Anklets|Smoky Quartz Anklets|11|s/ss|Smokyquartzanklets}} | ||
{{ | {{CoigreachDecorAll|Smoky Quartz Body Ornament|Smoky Quartz Body Ornament|11|s/ss|Smokyquartzbodyornament}} | ||
{{ | {{CoigreachDecorAll|Smoky Quartz Bracelets|Smoky Quartz Bracelets|11|s/ss|Smokyquartzbracelets}} | ||
{{ | {{CoigreachDecorAll|Smoky Quartz Headwrap|Smoky Quartz Headwrap|11|s/ss|Smokyquartzheadwrap}} | ||
{{ | {{CoigreachDecorAll|Smoky Quartz Tailwrap|Smoky Quartz Tailwrap|11|s/ss|Smokyquartztailwrap}} | ||
{{ | {{CoigreachDecorAll|Black Leather Sporran|Black Leather Sporran|12|b/bb|Blackleathersporran}} | ||
{{ | {{CoigreachDecorAll|Brown Leather Sporran|Brown Leather Sporran|12|b/bb|Brownleathersporran}} | ||
{{ | {{CoigreachDecorAll|Fairy Ring Mushrooms|Fairy Ring Mushrooms|12|f/ff|Fairyringmushrooms}} | ||
{{ | {{CoigreachDecorAll|Moss Fawn|Moss Fawn|14|m/mm|Mossfawn}} | ||
{{ | {{CoigreachDecorAll|Moss Puppy|Moss Puppy|14|m/mm|Mosspuppy}} | ||
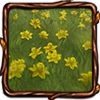
{{ | {{CoigreachDecorBelowAll|Daffodils|Daffodils|15|d/dd|Daffodils}} | ||
{{ | {{CoigreachDecorOne|Green Orbs|Green Orbs|15|g/gg|Greenorbs}} | ||
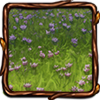
{{ | {{CoigreachDecorAll|Heather Bundle|Heather Bundle|15|h/hh|Heatherbundle}} | ||
{{ | {{CoigreachDecorAll|Heather Crown|Heather Crown|15|h/hh|Heathercrown}} | ||
{{ | {{CoigreachDecorAll|Lunula [Gold]|Lunula [Gold]|15|l/ll|Lunulagold}} | ||
{{ | {{CoigreachDecorAll|Lunula [Silver]|Lunula [Silver]|15|l/ll|Lunulasilver}} | ||
{{ | {{CoigreachDecorAll|Smoky Quartz Necklace|Smoky Quartz Necklace|15|s/ss|Smokyquartznecklace}} | ||
{{ | {{CoigreachDecorAll|Spiral Bracelet [Gold]|Spiral Bracelet [Gold]|15|s/ss|Spiralbraceletgold}} | ||
{{ | {{CoigreachDecorAll|Spiral Bracelet [Silver]|Spiral Bracelet [Silver]|15|s/ss|Spiralbraceletsilver}} | ||
{{ | {{CoigreachDecorAll|Thistle|Thistle|15|t/tt|Thistle}} | ||
{{ | {{CoigreachDecorAll|Torc [Gold]|Torc [Gold]|15|t/tt|Torcgold}} | ||
{{ | {{CoigreachDecorAll|Torc [Silver]|Torc [Silver]|15|t/tt|Torcsilver}} | ||
{{ | {{CoigreachDecorOne|Yellow Orbs|Yellow Orbs|15|y/yy|Yelloworbs}} | ||
{{CoigreachDecorAll|Cernunnos Headpiece [Copper]|Cernunnos Headpiece [Copper]|16|c/cc|Cernunnosheadpiececopper}} | |||
{{CoigreachDecorAll|Cernunnos Headpiece [Green]|Cernunnos Headpiece [Green]|16|c/cc|Cernunnosheadpiecegreen}} | |||
{{CoigreachDecorAll|Cernunnos Legwraps [Copper]|Cernunnos Legwraps [Copper]|16|c/cc|Cernunnoslegwrapscopper}} | |||
{{CoigreachDecorAll|Cernunnos Legwraps [Green]|Cernunnos Legwraps [Green]|16|c/cc|Cernunnoslegwrapsgreen}} | |||
{{CoigreachDecorAll|Scottish Fold|Scottish Fold|20|s/ss|Scottishfold}} | |||
{{CoigreachDecorBelowAll|Shetland Pony [Black Tobiano]|Shetland Pony [Black Tobiano]|25|s/ss|Shetlandponyblacktobiano}} | |||
{{CoigreachDecorBelowAll|Shetland Pony [Chestnut]|Shetland Pony [Chestnut]|25|s/ss|Shetlandponychestnut}} | |||
{{CoigreachDecorBelowAll|Shetland Pony [Grulla]|Shetland Pony [Grulla]|25|s/ss|Shetlandponygrulla}} | |||
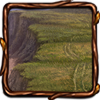
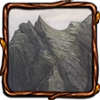
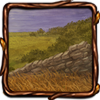
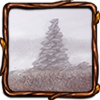
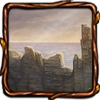
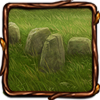
{{CoigreachBackground|Beinn Eighe|Beinn Eighe|30|b/bb|Beinneighe}} | |||
{{CoigreachBackground|Ben Alder|Ben Alder|30|b/bb|Benalder}} | |||
{{CoigreachBackground|Blanket Bog|Blanket Bog|30|b/bb|Blanketbog}} | |||
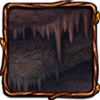
{{CoigreachBackground|Cleeves Cove Cave|Cleeves Cove Cave|30|c/cc|Cleevescovecave}} | |||
{{CoigreachBackground|Clover Field|Clover Field|30|c/cc|Cloverfield}} | |||
{{CoigreachBackground|Creswell Crag|Creswell Crag|30|c/cc|Creswellcrag}} | |||
{{CoigreachBackground|Daffodil Fields|Daffodil Fields|30|d/dd|Daffodilfields}} | |||
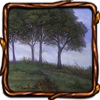
{{CoigreachBackground|Dartmoor Forest|Dartmoor Forest|30|d/dd|Dartmoorforest}} | |||
{{CoigreachBackground|Exmoor|Exmoor|30|e/ee|Exmoor}} | |||
{{CoigreachBackground|Heather Fields|Heather Fields|30|h/hh|Heatherfields}} | |||
{{CoigreachBackground|Ilkley Moor|Ilkley Moor|30|i/ii|Ilkleymoor}} | |||
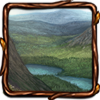
{{CoigreachBackground|Loch Maree|Loch Maree|30|l/ll|Lochmaree}} | |||
{{CoigreachBackground|Mount Snowdon|Mount Snowdon|30|m/mm|Mountsnowdon}} | |||
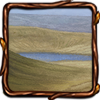
{{CoigreachBackground|Norfolk Coast|Norfolk Coast|30|n/nn|Norfolkcoast}} | |||
{{CoigreachBackground|Skellig Michael|Skellig Michael|30|s/ss|Skelligmichael}} | |||
{{CoigreachBackground|The Cairngorms|The Cairngorms|30|t/tt|Thecairngorms}} | |||
{{CoigreachBackground|Thistle Meadow|Thistle Meadow|30|t/tt|Thistlemeadow}} | |||
{{CoigreachBackground|Windermere Lake|Windermere Lake|30|w/ww|Windermerelake}} | |||
{{EndShopContent}} | {{EndShopContent}} | ||
<center>'''Tier 2'''<br><i>Unlocked on 15th | <center>'''Tier 2'''<br><i>Unlocked on November 15th</i></center> | ||
{{ShopContent}} | {{ShopContent}} | ||
{{ | {{CoigreachDecorAll|Boar Tusks Growth|Boar Tusks Growth|3|b/bb|Boartusksgrowth}} | ||
{{ | {{CoigreachDecorAll|Foundation Knot Anklets|Foundation Knot Anklets|5|f/ff|Foundationknotanklets}} | ||
{{ | {{CoigreachDecorAll|Foundation Knot Bracelets|Foundation Knot Bracelets|5|f/ff|Foundationknotbracelets}} | ||
{{ | {{CoigreachDecorAll|Foundation Knot Choker|Foundation Knot Choker|5|f/ff|Foundationknotchoker}} | ||
{{ | {{CoigreachDecorAll|Foundation Knot Tail Belt|Foundation Knot Tail Belt|5|f/ff|Foundationknottailbelt}} | ||
{{ | {{CoigreachDecorAll|Ogham Emblems Headwear [Gold]|Ogham Emblems Headwear [Gold]|12|o/oo|Oghamemblemsheadweargold}} | ||
{{ | {{CoigreachDecorAll|Ogham Emblems Headwear [Silver]|Ogham Emblems Headwear [Silver]|12|o/oo|Oghamemblemsheadwearsilver}} | ||
{{ | {{CoigreachDecorAll|Celtic Astrology [Amethyst] - Salmon Earring|Celtic Astrology [Amethyst] - Salmon Earring|15|c/cc|Celticastrologyamethystsalmonearring}} | ||
{{ | {{CoigreachDecorAll|Celtic Astrology [Carnelian] - Holly Tail Jewelry|Celtic Astrology [Carnelian] - Holly Tail Jewelry|15|c/cc|Celticastrologycarnelianhollytailjewelry}} | ||
{{ | {{CoigreachDecorAll|Celtic Astrology [Coral] - Green Bracelet|Celtic Astrology [Coral] - Green Bracelet|15|c/cc|Celticastrologycoralgreenbracelet}} | ||
{{ | {{CoigreachDecorAll|Celtic Astrology [Diamond] - Oaken Ogham Stick|Celtic Astrology [Diamond] - Oaken Ogham Stick|15|c/cc|Celticastrologydiamondoakenoghamstick}} | ||
{{ | {{CoigreachDecorAll|Celtic Astrology [Emerald] - Vine Vesture|Celtic Astrology [Emerald] - Vine Vesture|15|c/cc|Celticastrologyemeraldvinevesture}} | ||
{{ | {{CoigreachDecorAll|Celtic Astrology [Jasper] - Reed Bouquet|Celtic Astrology [Jasper] - Reed Bouquet|15|c/cc|Celticastrologyjasperreedbouquet}} | ||
{{ | {{CoigreachDecorAll|Celtic Astrology [Jet] - Raven Feather Hood|Celtic Astrology [Jet] - Raven Feather Hood|15|c/cc|Celticastrologyjetravenfeatherhood}} | ||
{{ | {{CoigreachDecorAll|Celtic Astrology [Moonstone] - Snake Headwear|Celtic Astrology [Moonstone] - Snake Headwear|15|c/cc|Celticastrologymoonstonesnakeheadwear}} | ||
{{ | {{CoigreachDecorAll|Celtic Astrology [Opal] - Ivy Growth|Celtic Astrology [Opal] - Ivy Growth|15|c/cc|Celticastrologyopalivygrowth}} | ||
{{ | {{CoigreachDecorAll|Celtic Astrology [Peridot] - Dragon Pendant|Celtic Astrology [Peridot] - Dragon Pendant|15|c/cc|Celticastrologyperidotdragonpendant}} | ||
{{ | {{CoigreachDecorAll|Celtic Astrology [Rock Crystal] - Stag Tiara|Celtic Astrology [Rock Crystal] - Stag Tiara|15|c/cc|Celticastrologyrockcrystalstagtiara}} | ||
{{ | {{CoigreachDecorAll|Celtic Astrology [Ruby] - Ogham Headwear|Celtic Astrology [Ruby] - Ogham Headwear|15|c/cc|Celticastrologyrubyoghamheadwear}} | ||
{{ | {{CoigreachDecorAll|Celtic Astrology [Topaz] - Ogham Trinket|Celtic Astrology [Topaz] - Ogham Trinket|15|c/cc|Celticastrologytopazoghamtrinket}} | ||
{{ | {{CoigreachDecorOne|Faint Orb|Faint Orb|15|f/ff|Faintorb}} | ||
{{ | {{CoigreachDecorAll|Glowing Orb|Glowing Orb|15|g/gg|Glowingorb}} | ||
{{ | {{CoigreachDecorAll|Ogham Emblems Bodywear [Gold]|Ogham Emblems Bodywear [Gold]|15|o/oo|Oghamemblemsbodyweargold}} | ||
{{ | {{CoigreachDecorAll|Ogham Emblems Bodywear [Silver]|Ogham Emblems Bodywear [Silver]|15|o/oo|Oghamemblemsbodywearsilver}} | ||
{{ | {{CoigreachDecorAll|Wheel of Taranis Body Jewelry|Wheel of Taranis Body Jewelry|15|w/ww|Wheeloftaranisbodyjewelry}} | ||
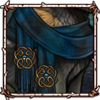
{{ | {{CoigreachDecorAll|Celtic Ruana Wrap [Black]|Celtic Ruana Wrap [Black]|16|c/cc|Celticruanawrapblack}} | ||
{{ | {{CoigreachDecorAll|Celtic Ruana Wrap [Green]|Celtic Ruana Wrap [Green]|16|c/cc|Celticruanawrapgreen}} | ||
{{ | {{CoigreachDecorAll|Celtic Ruana Wrap [Tartan]|Celtic Ruana Wrap [Tartan]|16|c/cc|Celticruanawraptartan}} | ||
{{ | {{CoigreachDecorAll|Lucky Scarf [Blue]|Lucky Scarf [Blue]|17|l/ll|Luckyscarfblue}} | ||
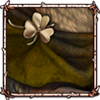
{{ | {{CoigreachDecorAll|Lucky Scarf [Green]|Lucky Scarf [Green]|17|l/ll|Luckyscarfgreen}} | ||
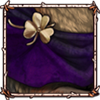
{{ | {{CoigreachDecorAll|Lucky Scarf [Purple]|Lucky Scarf [Purple]|17|l/ll|Luckyscarfpurple}} | ||
{{ | {{CoigreachDecorAll|Lucky Scarf [Red]|Lucky Scarf [Red]|17|l/ll|Luckyscarfred}} | ||
{{ | {{CoigreachDecorAll|Lucky Scarf [Yellow]|Lucky Scarf [Yellow]|17|l/ll|Luckyscarfyellow}} | ||
{{ | {{CoigreachDecorAll|Soft Checkered Scarf [Blue]|Soft Checkered Scarf [Blue]|17|s/ss|Softcheckeredscarfblue}} | ||
{{ | {{CoigreachDecorAll|Soft Checkered Scarf [Green]|Soft Checkered Scarf [Green]|17|s/ss|Softcheckeredscarfgreen}} | ||
{{ | {{CoigreachDecorAll|Soft Checkered Scarf [Purple]|Soft Checkered Scarf [Purple]|17|s/ss|Softcheckeredscarfpurple}} | ||
{{ | {{CoigreachDecorAll|Soft Checkered Scarf [Red]|Soft Checkered Scarf [Red]|17|s/ss|Softcheckeredscarfred}} | ||
{{ | {{CoigreachDecorAll|Soft Checkered Scarf [Yellow]|Soft Checkered Scarf [Yellow]|17|s/ss|Softcheckeredscarfyellow}} | ||
{{ | {{CoigreachDecorAll|Celtic Leather Straps Headwear|Celtic Leather Straps Headwear|18|c/cc|Celticleatherstrapsheadwear}} | ||
{{ | {{CoigreachDecorAll|Celtic Leather Straps Skirt|Celtic Leather Straps Skirt|18|c/cc|Celticleatherstrapsskirt}} | ||
{{ | {{CoigreachDecorAll|Company of Quany|Company of Quany|25|c/cc|Companyofquany}} | ||
{{ | {{CoigreachDecorAll|Company of Sirona|Company of Sirona|25|c/cc|Companyofsirona}} | ||
{{ | {{CoigreachDecorAll|Irish Setter|Irish Setter|25|i/ii|Irishsetter}} | ||
{{ | {{CoigreachBackground|Ardnamurchan|Ardnamurchan|30|a/aa|Ardnamurchan}} | ||
{{CoigreachBackground|Ben Nevis|Ben Nevis|30|b/bb|Bennevis}} | |||
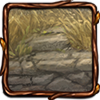
{{CoigreachBackground|Cairn Mound|Cairn Mound|30|c/cc|Cairnmound}} | |||
{{CoigreachBackground|Cairn Pillar|Cairn Pillar|30|c/cc|Cairnpillar}} | |||
{{CoigreachBackground|Cairn Ruins|Cairn Ruins|30|c/cc|Cairnruins}} | |||
{{CoigreachBackground|Entrance Grave|Entrance Grave|30|e/ee|Entrancegrave}} | |||
{{CoigreachBackground|Fairy Fort|Fairy Fort|30|f/ff|Fairyfort}} | |||
{{CoigreachBackground|Glen Nevis|Glen Nevis|30|g/gg|Glennevis}} | |||
{{CoigreachBackground|Jurassic Coast|Jurassic Coast|30|j/jj|Jurassiccoast}} | |||
{{CoigreachBackground|Loch Lomond|Loch Lomond|30|l/ll|Lochlomond}} | |||
{{CoigreachBackground|Loch Ness|Loch Ness|30|l/ll|Lochness}} | |||
{{CoigreachBackground|Marble Arch Cave|Marble Arch Cave|30|m/mm|Marblearchcave}} | |||
{{CoigreachBackground|Meehambee Dolmen|Meehambee Dolmen|30|m/mm|Meehambeedolmen}} | |||
{{CoigreachBackground|Menhir|Menhir|30|m/mm|Menhir}} | |||
{{CoigreachBackground|Picws Du|Picws Du|30|p/pp|Picwsdu}} | |||
{{CoigreachBackground|Smoo Cave|Smoo Cave|30|s/ss|Smoocave}} | |||
{{CoigreachBackground|Tory Island|Tory Island|30|t/tt|Toryisland}} | |||
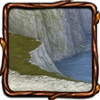
{{CoigreachBackground|White Cliffs of Dover|White Cliffs of Dover|30|w/ww|Whitecliffsofdover}} | |||
{{CoigreachShopItem|Claw Applicator [Fern]|[[File:Claw fern.png]]|100}} | {{CoigreachShopItem|Claw Applicator [Fern]|[[File:Claw fern.png]]|100}} | ||
{{CoigreachShopItem|Claw Applicator [Fey]|[[File:E claw fey.png]]|100}} | {{CoigreachShopItem|Claw Applicator [Fey]|[[File:E claw fey.png]]|100}} | ||
{{CoigreachShopItem|Claw Applicator [Peat]|[[File:E claw peat.png]]|100}} | {{CoigreachShopItem|Claw Applicator [Peat]|[[File:E claw peat.png]]|100}} | ||
{{CoigreachShopItem|Claw Applicator [Sitheach]|[[File:Clawapplicatorsitheach.png]]|100}} | |||
{{CoigreachShopItem|Claw Applicator [Tywyll]|[[File:E claw tywyll.png]]|100}} | {{CoigreachShopItem|Claw Applicator [Tywyll]|[[File:E claw tywyll.png]]|100}} | ||
{{CoigreachShopItem|Nose Applicator [Fern]|[[File:Nose fern.png]]|100}} | {{CoigreachShopItem|Nose Applicator [Fern]|[[File:Nose fern.png]]|100}} | ||
{{CoigreachShopItem|Nose Applicator [Fey]|[[File:E nose fey.png]]|100}} | {{CoigreachShopItem|Nose Applicator [Fey]|[[File:E nose fey.png]]|100}} | ||
{{CoigreachShopItem|Nose Applicator [Peat]|[[File:E nose peat.png]]|100}} | {{CoigreachShopItem|Nose Applicator [Peat]|[[File:E nose peat.png]]|100}} | ||
{{CoigreachShopItem|Nose Applicator [Sitheach]|[[File:Noseapplicatorsitheach.png]]|100}} | |||
{{CoigreachShopItem|Nose Applicator [Tywyll]|[[File:E nose tywyll.png]]|100}} | {{CoigreachShopItem|Nose Applicator [Tywyll]|[[File:E nose tywyll.png]]|100}} | ||
{{CoigreachShopItem|Skin Applicator [Fern]|[[File:Skin fern.png]]|100}} | {{CoigreachShopItem|Skin Applicator [Fern]|[[File:Skin fern.png]]|100}} | ||
{{CoigreachShopItem|Skin Applicator [Fey]|[[File:E skin fey.png]]|100}} | {{CoigreachShopItem|Skin Applicator [Fey]|[[File:E skin fey.png]]|100}} | ||
{{CoigreachShopItem|Skin Applicator [Peat]|[[File:E skin peat.png]]|100}} | {{CoigreachShopItem|Skin Applicator [Peat]|[[File:E skin peat.png]]|100}} | ||
{{CoigreachShopItem|Skin Applicator [Sitheach]|[[File:Skinapplicatorsitheach.png]]|100}} | |||
{{CoigreachShopItem|Skin Applicator [Tywyll]|[[File:E skin tywyll.png]]|100}} | {{CoigreachShopItem|Skin Applicator [Tywyll]|[[File:E skin tywyll.png]]|100}} | ||
{{EndShopContent}} | {{EndShopContent}} | ||
<center>'''Tier 3'''<br><i>Unlocked on 25th | <center>'''Tier 3'''<br><i>Unlocked on November 25th</i></center> | ||
{{ShopContent}} | {{ShopContent}} | ||
{{ | {{CoigreachDecorAll|Face Paint: Beltane|Face Paint: Beltane|3|f/ff|Facepaintbeltane}} | ||
{{ | {{CoigreachDecorAll|Face Paint: Eostre|Face Paint: Eostre|3|f/ff|Facepainteostre}} | ||
{{ | {{CoigreachDecorAll|Face Paint: Imbolc|Face Paint: Imbolc|3|f/ff|Facepaintimbolc}} | ||
{{ | {{CoigreachDecorAll|Faelcu's Antennae|Faelcu\'s Antennae|12|f/ff|Faelcusantennae}} | ||
{{ | {{CoigreachDecorAll|Face Paint: Faelcu|Face Paint: Faelcu|13|f/ff|Faelcusfacepaint}} | ||
{{ | {{CoigreachDecorAll|Neck Paint: Faelcu|Neck Paint: Faelcu|13|f/ff|Faelcusneckpaint}} | ||
{{ | {{CoigreachDecorBelowAll|Carved Stone|Carved Stone|15|c/cc|Carvedstone}} | ||
{{ | {{CoigreachDecorAll|Celtic Cloak [Black]|Celtic Cloak [Black]|15|c/cc|Celticcloakblack}} | ||
{{ | {{CoigreachDecorAll|Celtic Cloak [Brown]|Celtic Cloak [Brown]|15|c/cc|Celticcloakbrown}} | ||
{{ | {{CoigreachDecorAll|Celtic Cloak [Dun]|Celtic Cloak [Dun]|15|c/cc|Celticcloakdun}} | ||
{{ | {{CoigreachDecorAll|Celtic Cloak [Green]|Celtic Cloak [Green]|15|c/cc|Celticcloakgreen}} | ||
{{ | {{CoigreachDecorAll|Celtic Cloak [Red]|Celtic Cloak [Red]|15|c/cc|Celticcloakred}} | ||
{{ | {{CoigreachDecorOne|Floating Wisp [High]|Floating Wisp [High]|15|f/ff|Floatingwisphigh}} | ||
{{ | {{CoigreachDecorAll|Floating Wisp [Low]|Floating Wisp [Low]|15|f/ff|Floatingwisplow}} | ||
{{ | {{CoigreachDecorBelowAll|Floating Wisp [Small, High]|Floating Wisp [Small, High]|15|f/ff|Floatingwispsmallhigh}} | ||
{{ | {{CoigreachDecorOne|Floating Wisp [Small, Low]|Floating Wisp [Small, Low]|15|f/ff|Floatingwispsmalllow}} | ||
{{ | {{CoigreachDecorBelowOne|Triskelion Pictish Stone|Triskelion Pictish Stone|15|t/tt|Triskelionpictishstone}} | ||
{{ | {{CoigreachDecorAll|Faelcu's Growths|Faelcu\'s Growths|16|f/ff|Faelcusgrowths}} | ||
{{ | {{CoigreachDecorAll|Faelcu's Tail Extension|Faelcu\'s Tail Extension|16|f/ff|Faelcustailextension}} | ||
{{ | {{CoigreachDecorAll|The Sídhe: Moddey Dhoo [Puppy]|The Sídhe: Moddey Dhoo [Puppy]|25|t/tt|Thesidhemoddeydhoopuppy}} | ||
{{ | {{CoigreachDecorBelowAll|Beithir|Beithir|30|b/bb|Beithir}} | ||
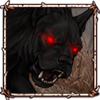
{{ | {{CoigreachDecorBelowAll|Black Shuck|Black Shuck|30|b/bb|Blackshuck}} | ||
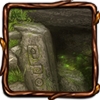
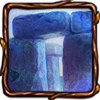
{{ | {{CoigreachBackground|Callanish Stones|Callanish Stones|30|c/cc|Callanishstones}} | ||
{{ | {{CoigreachBackground|Cave Entrance|Cave Entrance|30|c/cc|Caveentrance}} | ||
{{ | {{CoigreachBackground|Cave Passage|Cave Passage|30|c/cc|Cavepassage}} | ||
{{ | {{CoigreachBackground|Cave Tunnel|Cave Tunnel|30|c/cc|Cavetunnel}} | ||
{{ | {{CoigreachBackground|Cliffs of Moher|Cliffs of Mohor|30|c/cc|Cliffsofmoher}} | ||
{{ | {{CoigreachDecorBelowAll|Cernunnos Stag|Cernunnos Stage|30|c/cc|Cernunnosstag}} | ||
{{ | {{CoigreachBackground|Court Cairn|Court Cairn|30|c/cc|Courtcairn}} | ||
{{ | {{CoigreachBackground|Dolmen|Dolmen|30|d/dd|Dolmen}} | ||
{{ | {{CoigreachBackground|Fairy Mushroom Ring|Fairy Mushroom Ring|30|f/ff|Fairymushroomring}} | ||
{{ | {{CoigreachBackground|Fairy Ring Moss|Fairy Ring Moss|30|f/ff|Fairyringmoss}} | ||
{{ | {{CoigreachBackground|Giant's Causeway|Giant\'s Causeway|30|g/gg|Giantscauseway}} | ||
{{CoigreachBackground|Skrinkle Haven|Skrinkle Haven|30|s/ss|Skrinklehaven}} | |||
{{CoigreachBackground|Stone Ring|Stone Ring|30|s/ss|Stonering}} | |||
{{CoigreachBackground|Stonehenge|Stonehenge|30|s/ss|Stonehenge}} | |||
{{CoigreachDecorAll|The Sídhe: Barghest|The Sídhe: Barghest|30|t/tt|Thesidhebarghest}} | |||
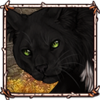
{{CoigreachDecorAll|The Sídhe: Cat-sìth|The Sídhe: Cat-sìth|30|t/tt|Thesidhecatsith}} | |||
{{CoigreachDecorAll|The Sídhe: Cù-sìth|The Sídhe: Cù-sìth|30|t/tt|Thesidhecusith}} | |||
{{CoigreachDecorAll|The Sídhe: Gwyllgi|The Sídhe: Gwyllgi|30|t/tt|Thesidhegwyllgi}} | |||
{{CoigreachDecorAll|The Sídhe: Moddey Dhoo|The Sídhe: Moddey Dhoo|30|t/tt|Thesidhemoddeydhoo}} | |||
{{CoigreachBackground|Uragh Stone Circle|Uragh Stone Circle|30|u/uu|Uraghstonecircle}} | |||
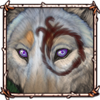
{{CoigreachShopItem|Eye Applicator [Changeling]|[[File:eyes changeling.png]]|150}} | {{CoigreachShopItem|Eye Applicator [Changeling]|[[File:eyes changeling.png]]|150}} | ||
{{CoigreachShopItem|Eye Applicator [Dorchas]|[[File:Eyeapplicatordorchas.png]]|150}} | |||
{{CoigreachShopItem|Eye Applicator [Fae]|[[File:E eyes fae.png]]|150}} | {{CoigreachShopItem|Eye Applicator [Fae]|[[File:E eyes fae.png]]|150}} | ||
{{CoigreachShopItem|Eye Applicator [Rhudd]|[[File:E eyes rhudd.png]]|150}} | {{CoigreachShopItem|Eye Applicator [Rhudd]|[[File:E eyes rhudd.png]]|150}} | ||
{{CoigreachShopItem|Eye Applicator [Wisp]|[[File:Eyes wisp.png]]|150}} | {{CoigreachShopItem|Eye Applicator [Wisp]|[[File:Eyes wisp.png]]|150}} | ||
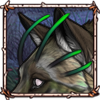
{{CoigreachShopItem|Markings Applicator [Annwn]|[[File:E markings annwn.png]]|200}} | {{CoigreachShopItem|Markings Applicator [Annwn]|[[File:E markings annwn.png]]|200}} | ||
{{CoigreachShopItem|Markings Applicator [Aotrom]|[[File:Markingsapplicatoraotrom.png]]|200}} | |||
{{CoigreachShopItem|Markings Applicator [Clover]|[[File:Markings clover.png]]|200}} | {{CoigreachShopItem|Markings Applicator [Clover]|[[File:Markings clover.png]]|200}} | ||
{{CoigreachShopItem|Markings Applicator [Faelcu]|[[File:E markings faelcu.png]]|200}} | {{CoigreachShopItem|Markings Applicator [Faelcu]|[[File:E markings faelcu.png]]|200}} | ||
{{CoigreachShopItem|Markings Applicator [Fuath]|[[File:E markings fuath.png]]|200}} | {{CoigreachShopItem|Markings Applicator [Fuath]|[[File:E markings fuath.png]]|200}} | ||
{{CoigreachShopItem|Markings Applicator [Gaelach]|[[File:Markingsapplicatorgaelach.png]]|200}} | |||
{{CoigreachShopItem|Markings Applicator [Gwyrdd]|[[File:E markings gwyrdd.png]]|200}} | {{CoigreachShopItem|Markings Applicator [Gwyrdd]|[[File:E markings gwyrdd.png]]|200}} | ||
{{CoigreachShopItem|Markings Applicator [Moss]|[[File:Markings moss.png]]|200}} | {{CoigreachShopItem|Markings Applicator [Moss]|[[File:Markings moss.png]]|200}} | ||
| Line 344: | Line 403: | ||
{{CoigreachShopItem|Markings Applicator [Wisp]|[[File:E markings wisp.png]]|200}} | {{CoigreachShopItem|Markings Applicator [Wisp]|[[File:E markings wisp.png]]|200}} | ||
{{CoigreachShopItem|Base Applicator [Annwn]|[[File:E base annwn.png]]|250}} | {{CoigreachShopItem|Base Applicator [Annwn]|[[File:E base annwn.png]]|250}} | ||
{{CoigreachShopItem|Base Applicator [Faelcu]|[[File:E base faelcu.png]]|250}} | |||
{{CoigreachShopItem|Base Applicator [Fuath]|[[File:E base fuath.png]]|250}} | {{CoigreachShopItem|Base Applicator [Fuath]|[[File:E base fuath.png]]|250}} | ||
{{CoigreachShopItem|Base Applicator [Gwyrdd]|[[File:E base gwyrdd.png]]|250}} | |||
{{CoigreachShopItem|Base Applicator [Sidhe]|[[File:E base sidhe.png]]|250}} | {{CoigreachShopItem|Base Applicator [Sidhe]|[[File:E base sidhe.png]]|250}} | ||
{{CoigreachShopItem|Base Applicator [Wisp]|[[File:E base wisp.png]]|250}} | {{CoigreachShopItem|Base Applicator [Wisp]|[[File:E base wisp.png]]|250}} | ||
{{EndShopContent}} | {{EndShopContent}} | ||
</div> | |||
{{DecorModalV1}} | |||
{{BackgroundModal}} | |||
[[Category:Events]] | [[Category:Events]] | ||
[[Category:Shops]] | [[Category:Shops]] | ||
Latest revision as of 03:21, 4 November 2025
Strange things are happening in the lands close to your home. Shimmering lights in the distance, whispers on the wind, mournful howling in the morning light... what could be causing these disturbances?

Coigreach is a recurring event happening every November and lasting the whole month. The event begins at 00:00 on November 1st and ends at 23:59 on November 30th.
| Table of Contents |
|---|
| Links not working? Sections must be expanded to jump to a subheader within them! |
| Event Basics |
| Frequently-Asked Questions |
| Event Herbs |
| Event-Exclusive Items |
| Storyline |
| Exploring |
| Daily Favours |
| Badger Cave |
Event Basics
Event Basics
Coigreach presents a variety of new mechanics and features to explore all throughout the month! They aren't all available right away- stick around all month long to get the most of what the event has to offer. A lot of this event is driven by a storyline that progresses over the course of the month, but some other parts of the event are tied to specific dates rather than moments in the story.
This event has an exclusive currency, ![]() Smoky Quartz, which are obtained through exploring, completing Badger Cave favors, and following the storyline.
Smoky Quartz, which are obtained through exploring, completing Badger Cave favors, and following the storyline. ![]() Smokey Quartz can be used to purchase items in the event shop.
Smokey Quartz can be used to purchase items in the event shop.
Frequently-Asked Questions
Frequently-Asked Questions
Are the rewards for completing the storyline the same every year?
Nope! New base applicators will be added as storyline rewards each year to replace the last year's applicators.
Event Herbs
Event Herbs
Throughout the month of November, you may notice that your herbalist is bringing back some new and unusual herbs! These herbs, which all originate from Europe, do not have any use right now aside from crafting nesting materials. It was implied in the Coigreach announcement post that the herbs will serve some more function later, so we would recommend saving them!
These herbs cannot be exchanged for at the herbalist, but they can be used to exchange for other herbs. They are not used to craft any medicine, but they can be used to craft Nesting Materials in your Hoard.
| Coigreach Herbs | ||||
|---|---|---|---|---|
 Elder |
 Elfwort |
 English Marigold |
 Evening Primrose |
 Meadowsweet |
 Nettle |
 Vervain |
 White Clover |
 Woad |
 Wood Betony |
Event-Exclusive Items
Event-Exclusive Items
The following items can only be obtained through Coigreach explore encounters. For details on how to get each item, you can search the item's name on the Coigreach Explore Encounters page. Wealden Amber and Sheep Skull do not currently have a use, but they are likely to in the future.
Large Smoky Quartz Chunks can be obtained rarely while exploring during the nighttime, when following a wisp through a cave chain. Selecting the Quartz Chunk in your hoard will prompt you to open the bundle, which has the chance to randomly drop ![]() 3, 4, or 5 Smoky Quartz, which will be added to your normal currency stash.
3, 4, or 5 Smoky Quartz, which will be added to your normal currency stash.
| Coigreach Exclusive Items | ||||
|---|---|---|---|---|
 Wealden Amber |
 Sheep Skull |
 Smoky Quartz Chunk |
||
Storyline
Storyline
Coigreach brings a long, intricate storyline that can be accessed through the Event page, by clicking on the Coigreach banner. The storyline is not required, but is recommended for anyone interested in the event as rewards are granted after the storyline's completion.
Click here to view the storyline!
The storyline consists of two parts: the base storyline, and a storyline extension added in 2022. Completion of the base storyline will reward the player with one of two base applicators, Clover or Moss, depending on which ending they choose. Completion of the storyline extension, which begins on 20th November, will reward one of two new base applicators introduced that year.
In order to complete the storyline, players are required to rollover at least 3 times. There is a 1-rollover waiting period after the first part of chapter one and another 1-rollover waiting period at the end of chapter one. In the middle of part 2 of the storylinw, another 1-rollove waiting period is required. Between these, chapters open up on specific dates. Chapter Three begins on November 5th, Chapter Four begins on November 10th, and Chapter Five begins on November 15th. You can start the storyline any time after these dates, as long as you allow yourself about a week before the end of November to complete the rollover waiting periods and find storyline explore encounters. The storyline expansion begins on 20th November.
Exploring
Exploring
In order to progress in the event's storyline and collect currency for the shop, you must explore. Many new, event-exclusive explore encounters begin showing up as soon as November starts!
Daily Favours
Daily Favours
Once the Badger Cave opens, you may take a daily favour with the shopkeepers in exchange for ![]() SQ. You can find favours at the top of the store page!
SQ. You can find favours at the top of the store page!

The item required to complete the favour is randomized. Some possibilities include 5 herbs, 1 of each cave-building material, 1 amusement item, 1 critter carcass, or 1 medicine. Items given to the shopkeepers do not need to be full-use. Turning in a favour will always reward ![]() 5 SQ, no matter what the favour is.
5 SQ, no matter what the favour is.

After completing a daily favour, you must wait until your next rollvoer to take the next request.
Badger Cave
Badger Cave
This month's shop is run by two unusual visitors, a large badger and their small hedgehog friend! Tiers of the Badger Cave open up on specific dates. Once a new tier of the shop opens, new items will be available to purchase. Previous tiers of the shop will all remain open as more tiers unlock.

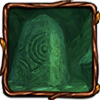
| Badger and Hedgehog | ||
 |
Two strange creatures sit in front of a small den entrance with unfamiliar symbols etched onto the archway. The small, prickly hedgehog sniffs up at you curiously, while the larger badger watches you with a keen, kind expression.
|
|
Shopkeepers |
|
|
Unlocked on November 5th


Unlocked on November 15th


Unlocked on November 25th


Decor Name
Background Name